
Introduction to Red & Pink Desserts
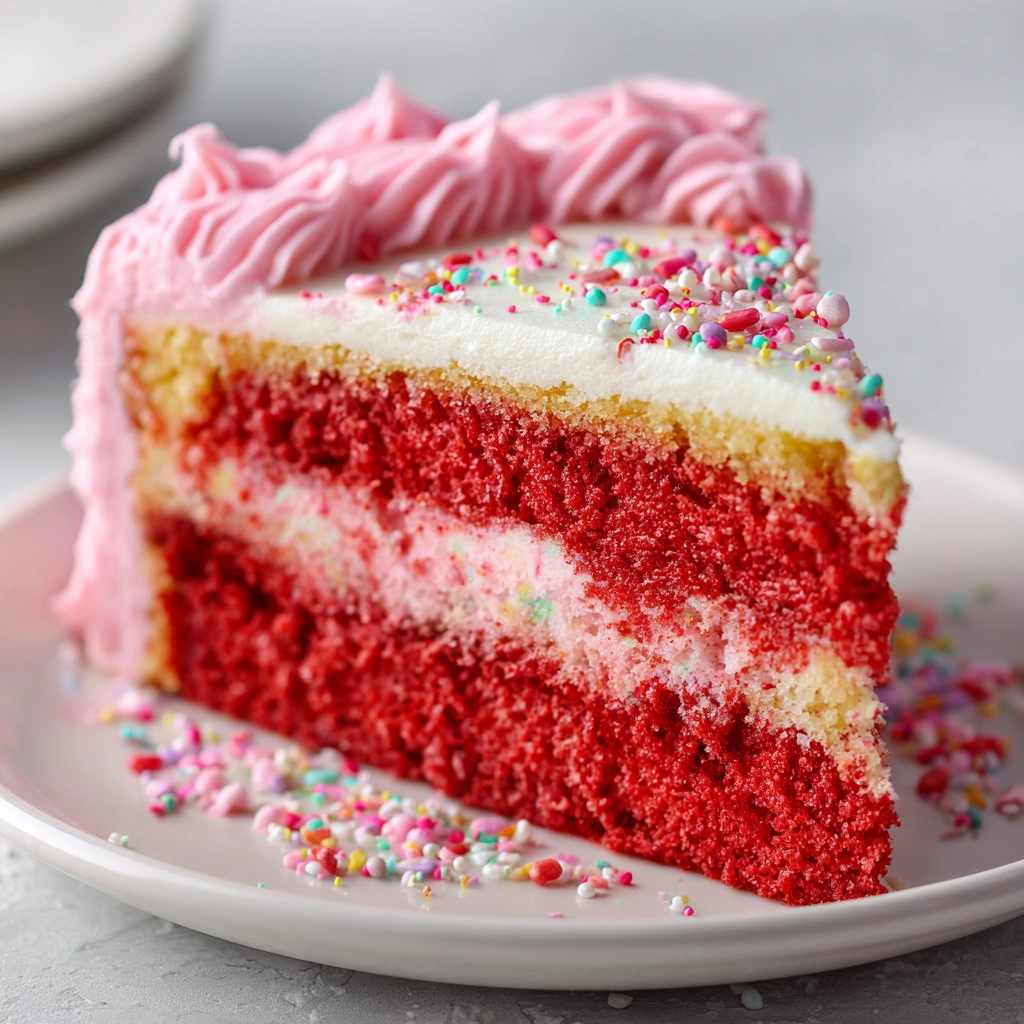
Welcome to the world of Red & Pink Desserts, where sweetness meets stunning visuals! As a busy mom, I know how challenging it can be to whip up something delightful that also impresses the family. These vibrant treats are not just a feast for the eyes; they’re a quick solution for those hectic days when you want to bring a smile to your loved ones’ faces. Whether it’s a birthday, a holiday, or just a Tuesday, these desserts are sure to brighten any occasion. Let’s dive into this delicious adventure together!
Why You’ll Love This Red & Pink Desserts
These Red & Pink Desserts are a dream come true for busy moms and professionals alike. They’re not only easy to make but also incredibly quick, taking just about 50 minutes from start to finish. The taste? Oh, it’s a delightful blend of sweetness that will have everyone asking for seconds! Plus, their vibrant colors make them perfect for any occasion, ensuring you’ll impress your family and friends effortlessly.
Ingredients for Red & Pink Desserts
Gathering the right ingredients is the first step to creating these delightful Red & Pink Desserts. Here’s what you’ll need:
- All-purpose flour: The backbone of your dessert, providing structure and texture.
- Sugar: Sweetness is key! It balances flavors and helps create that lovely golden crust.
- Unsalted butter: Adds richness and moisture. Make sure it’s softened for easy mixing.
- Large eggs: They bind everything together and contribute to the fluffiness of your treats.
- Milk: This ingredient enhances moisture and gives your desserts a tender crumb.
- Vanilla extract: A splash of this adds a warm, inviting flavor that complements the sweetness.
- Red food coloring: The star of the show! It gives your desserts that eye-catching hue.
- Pink frosting: For a sweet finish, this adds a pop of color and flavor on top.
- Sprinkles (optional): These little gems are perfect for adding a festive touch to your desserts.
For those looking to mix things up, consider using cream cheese frosting instead of pink frosting for a tangy twist. You can find all the exact measurements at the bottom of the article, ready for printing. Happy baking!
How to Make Red & Pink Desserts
Now that we have our ingredients ready, let’s dive into the fun part—making these delightful Red & Pink Desserts! Follow these simple steps, and you’ll have a treat that’s as delicious as it is beautiful.
Step 1: Preheat the Oven
First things first, preheat your oven to 350°F (175°C). This step is crucial because it ensures your desserts bake evenly. A hot oven helps create that perfect rise and texture. Trust me, you don’t want to skip this part!
Step 2: Cream Butter and Sugar
In a large bowl, cream together the softened butter and sugar until it’s light and fluffy. This process is essential for incorporating air into the mixture, which gives your desserts a lovely texture. It should look pale and creamy—like a cloud of sweetness!
Step 3: Add Eggs and Mix
Next, add the eggs one at a time, mixing well after each addition. This step is important because it allows each egg to fully incorporate into the batter. It helps create a smooth mixture that will hold everything together beautifully.
Step 4: Incorporate Milk and Vanilla
Now, stir in the milk and vanilla extract. These ingredients not only enhance the flavor but also add moisture to your batter. The vanilla brings a warm, inviting aroma that will make your kitchen smell heavenly!
Step 5: Gradually Add Flour
It’s time to add the flour! Gradually mix it into the batter until just combined. Be careful not to overwork the mixture, as this can lead to dense desserts. We want them light and fluffy, like a sweet hug!
Step 6: Add Red Food Coloring
Now comes the fun part—adding the red food coloring! Mix it in until you achieve your desired color intensity. If you want a deeper red, feel free to add a bit more. Just remember, a little goes a long way!
Step 7: Prepare for Baking
Decide whether you want to make a cake or cookies. If you’re going for a cake, pour the batter into a greased cake pan. For cookies, drop spoonfuls onto a baking sheet lined with parchment paper. Either way, make sure to leave some space between them for spreading.
Step 8: Bake to Perfection
Pop your treats into the oven and bake for 25-30 minutes. To check for doneness, insert a toothpick into the center. If it comes out clean, they’re ready! Let them cool completely on a wire rack before frosting.
Step 9: Frost and Decorate
Once your desserts are cool, it’s time to frost! Spread the pink frosting generously on top. For an extra festive touch, sprinkle some colorful sprinkles on top. This final step adds a pop of joy that’s hard to resist!
Tips for Success
- Always measure your ingredients accurately for the best results.
- Use room temperature ingredients for easier mixing and better texture.
- Don’t skip the cooling step; frosting on warm desserts can melt away.
- Experiment with different food coloring brands for vibrant results.
- Store leftovers in an airtight container to keep them fresh longer.
Equipment Needed
- Mixing bowls: A large bowl for mixing and a smaller one for creaming.
- Electric mixer: A hand mixer works great, but a whisk can do the job too!
- Baking sheets or cake pan: Use parchment paper for easy cleanup.
- Measuring cups and spoons: Essential for accuracy in baking.
- Cooling rack: Helps desserts cool evenly; a plate can work in a pinch.
Variations of Red & Pink Desserts
- Chocolate Red Velvet: Swap out some of the flour for cocoa powder to create a rich chocolate flavor.
- Gluten-Free Option: Use a gluten-free all-purpose flour blend to make these desserts suitable for gluten-sensitive friends.
- Fruit-Infused: Add pureed strawberries or raspberries to the batter for a fruity twist and natural flavor.
- Vegan Version: Replace eggs with flaxseed meal and use plant-based milk and butter for a delicious vegan treat.
- Nutty Delight: Fold in chopped nuts like walnuts or pecans for added texture and flavor.
Serving Suggestions for Red & Pink Desserts
- Pair with a scoop of vanilla ice cream for a delightful contrast in temperature and flavor.
- Serve alongside fresh berries to enhance the fruity notes in your desserts.
- For a festive touch, present on a colorful platter with edible flowers.
- Complement with a glass of sparkling lemonade for a refreshing drink.
- Drizzle with chocolate sauce for an extra indulgent experience.
FAQs about Red & Pink Desserts
As you embark on your baking journey with these delightful Red & Pink Desserts, you might have a few questions. Here are some common queries I’ve encountered, along with helpful answers!
Can I use different colors of food coloring?
Absolutely! While red is the star of the show, feel free to experiment with other colors. Pink, purple, or even a rainbow effect can make your desserts even more fun and festive!
How do I store leftover Red & Pink Desserts?
Store your desserts in an airtight container at room temperature for up to three days. If you want to keep them longer, refrigerate them for up to a week. Just make sure to let them come to room temperature before serving!
Can I freeze these desserts?
Yes, you can! Wrap them tightly in plastic wrap and place them in a freezer-safe container. They can be frozen for up to three months. Just thaw them in the fridge overnight before enjoying!
What can I substitute for eggs in this recipe?
If you’re looking for an egg substitute, try using 1/4 cup of unsweetened applesauce or a flaxseed meal mixture (1 tablespoon of flaxseed meal mixed with 2.5 tablespoons of water). Both options work well in keeping your desserts moist!
Can I make these desserts ahead of time?
Definitely! You can bake them a day in advance. Just store them properly and frost them right before serving for the best taste and presentation.
Final Thoughts
Creating these Red & Pink Desserts is more than just baking; it’s about making memories. The joy on my family’s faces when they see these vibrant treats is priceless. Whether it’s a special occasion or a simple weeknight dessert, these delightful creations bring a burst of color and sweetness to our table. I hope you find as much happiness in making them as I do. So, roll up your sleeves, gather your loved ones, and let’s bake some joy together! Trust me, these desserts will become a cherished part of your family traditions.
Print
Red & Pink Desserts: Delightful Treats You Can’t Resist!
- Prep Time: 20 minutes
- Cook Time: 30 minutes
- Total Time: 50 minutes
- Yield: 12 servings 1x
- Category: Desserts
- Method: Baking
- Cuisine: American
- Diet: Vegetarian
Description
A collection of delightful red and pink desserts that are visually stunning and irresistibly delicious, perfect for any occasion.
Ingredients
- 2 cups all-purpose flour
- 1 cup sugar
- 1/2 cup unsalted butter, softened
- 2 large eggs
- 1/2 cup milk
- 1 teaspoon vanilla extract
- 1/2 cup red food coloring
- 1/2 cup pink frosting
- 1/4 cup sprinkles (optional)
Instructions
- Preheat the oven to 350°F (175°C).
- In a large bowl, cream together the butter and sugar until light and fluffy.
- Add the eggs one at a time, mixing well after each addition.
- Stir in the milk and vanilla extract.
- Gradually add the flour and mix until just combined.
- Mix in the red food coloring until the desired color is achieved.
- Pour the batter into a greased cake pan or drop spoonfuls onto a baking sheet for cookies.
- Bake for 25-30 minutes or until a toothpick inserted into the center comes out clean.
- Let cool completely before frosting with pink frosting and adding sprinkles if desired.
Notes
- For a deeper red color, add more food coloring.
- These desserts can be made ahead of time and stored in an airtight container.
- Feel free to substitute the frosting with cream cheese frosting for a tangy flavor.
Nutrition
- Serving Size: 1 dessert
- Calories: 250
- Sugar: 20g
- Sodium: 150mg
- Fat: 10g
- Saturated Fat: 5g
- Unsaturated Fat: 3g
- Trans Fat: 0g
- Carbohydrates: 35g
- Fiber: 1g
- Protein: 3g
- Cholesterol: 30mg


