
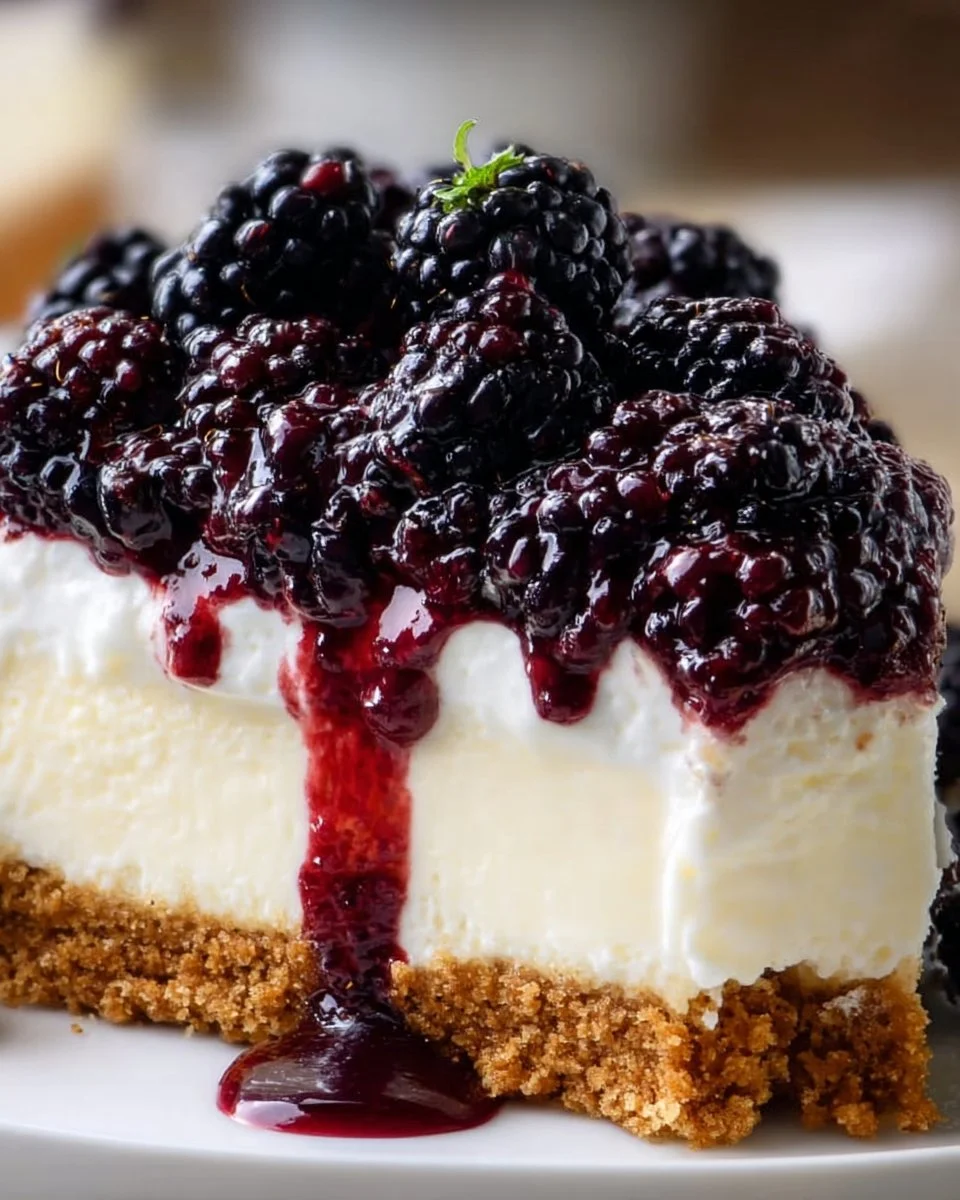
Indulge your senses in a dessert that personifies indulgence—the no-bake blackberry cheesecake. Imagine sinking your fork into a dessert where the creamy richness of softened cream cheese meets the tangy freshness of seasonal blackberries, expertly balanced atop a buttery graham cracker crust. As you take your first bite, the velvety texture envelopes your palate like a cozy embrace, while the jewel-like blackberries burst forth, releasing their sweet-tart juice that dances lightly on your taste buds. The aroma of whipped cream and vanilla brings warmth to your kitchen, inviting those nearby to gather in anticipation. This cheesecake promises to be more than just a dessert; it’s an experience that creates moments and memories.
What makes this no-bake blackberry cheesecake special is its simplicity. You create a stunning, show-stopping dessert without turning on an oven, maintaining the cool essence of summer days. Each slice reveals layers of creamy decadence, sunny berry notes, and a delightful crunch from the crust. Perfect for those hot afternoons or family gatherings, this dessert is a celebration of delicious flavors and a testament to the beauty of time well spent in the kitchen. And let’s be honest—a no-bake cheesecake is a perfect canvas for storytelling, conversation, and, of course, savoring every bite.
Why You’ll Love This No-Bake Blackberry Cheesecake
There are countless reasons to fall head over heels for this no-bake blackberry cheesecake. First and foremost, the taste is nothing short of extraordinary. The luxurious cream cheese filling provides a luscious foundation, enhanced subtly by the sweetness of powdered sugar and the richness of whipped cream. Then there’s the blackberry topping—a brilliant addition that brings a pop of color and a burst of fresh flavor. The combination of sweet and tart in every bite makes this cheesecake a standout dessert.
This dessert shines across a variety of occasions. From festive holiday gatherings to casual summertime picnics, it’s just the right amount of indulgent to impress your guests without overwhelming them. The no-bake aspect means less time spent in the kitchen and more time connecting with loved ones. Furthermore, the visual appeal of a blackberry cheesecake garnished with glossy, vibrant berries can’t be overstated; it draws people in and sets the stage for an unforgettable feast.
Preparation Phase & Tools to Use
Before diving into making this delightful cheesecake, gather your essential tools. Each one plays a critical role in ensuring your dessert turns out perfectly.
- 9-inch springform pan: This pan allows for easy removal of the cheesecake. Its movable sides ensure that every slice comes out pristine.
- Mixing bowls: Have a couple on hand—one for the crust and another for the cheesecake filling.
- Hand mixer or stand mixer: To achieve that flawless, creamy consistency, a mixer is a must-have.
- Spatula: A flexible spatula helps in folding in the whipped cream and smoothing the top of your cheesecake.
- Saucepan: You’ll need this for creating the blackberry topping. Its even heat distribution allows the blackberries to cook evenly and caramelize beautifully.
Preparation Tips:
- Use softened cream cheese for the smoothest texture; let it sit at room temperature for about 30 minutes before mixing.
- Chill the springform pan in the fridge for a few minutes before pressing the crust in; it helps maintain the shape while firming up the crust.
Ingredients for No-Bake Blackberry Cheesecake
- 1 1/2 cups graham cracker crumbs: Ideally made from fresh graham crackers for a proper crunch. You can also use digestive biscuits for a different flavor profile.
- 1/2 cup unsalted butter, melted: Unsalted butter allows you to control the saltiness of the dessert.
- 2 cups cream cheese, softened: Use full-fat cream cheese for the best richness. Light cream cheese may yield a less creamy filling.
- 1 cup powdered sugar: This gives the cheesecake its sweet undertone. For a healthier option, you can substitute with a sugar alternative.
- 1 teaspoon vanilla extract: Pure vanilla extract elevates the flavor, but imitation vanilla works too in a pinch.
- 1 1/2 cups whipped cream: Freshly whipped cream will create an airy texture. You can also use store-bought for convenience.
- 2 cups fresh blackberries: Ripe, seasonal blackberries provide the best flavor. If unavailable, frozen blackberries can work; just ensure they are thawed and drained.
- 1/4 cup sugar (for blackberry topping): This sweetens the blackberry sauce; adjust based on the berries’ natural sweetness.
- 1 tablespoon lemon juice: Fresh lemon juice brightens the flavors and balances the sweetness.
How to Make No-Bake Blackberry Cheesecake
Creating your no-bake blackberry cheesecake is an adventure that unfolds in simple, delightful steps.
-
Prepare the crust: In a mixing bowl, combine the graham cracker crumbs and melted butter. Stir until the crumbs are fully coated. Firmly press the mixture into the bottom of a 9-inch springform pan to form an even layer. Refrigerate for 10 minutes to set the crust.
-
Make the filling: In another mixing bowl, beat the softened cream cheese with a mixer on medium speed until smooth and creamy. Gradually add the powdered sugar and vanilla extract, mixing until the mixture is completely combined and free of lumps.
-
Incorporate whipped cream: Gently fold in the whipped cream using a spatula. Be careful not to overmix—this helps maintain the light and airy texture of the cheesecake.
-
Combine layers: Pour the cream cheese filling over the chilled crust and smooth the top with your spatula for an even finish.
-
Prepare the blackberry topping: In a saucepan over medium heat, combine the blackberries, sugar, and lemon juice. Cook until the blackberries break down and release their juices, thickening slightly—about 5-7 minutes. Allow the mixture to cool slightly.
-
Assemble it all: Pour the cooled blackberry topping over the cheesecake, spreading it evenly.
-
Chill: Place the assembled cheesecake in the refrigerator and let it set for at least 4 hours, or overnight for best results.
-
Serve: After setting, carefully run a knife around the edge of the springform pan before removing the sides. Slice, serve, and enjoy chilled.
Chef’s Notes & Helpful Tips
- Make-ahead tips: This cheesecake holds up beautifully in the refrigerator, making it an ideal make-ahead dessert. It tastes even better the next day as the flavors continue to meld.
- Cooking alternatives: For a different experience, consider making this cheesecake in an air fryer using a similar pan, or experiment with mini versions in cupcake tins for easy individual servings.
- Customization ideas: Feel free to replace blackberries with other berries—raspberries, blueberries, or strawberries all make fantastic variations. Add a hint of spice (like cinnamon or nutmeg) to the crust for a simple flavor boost.
Common Mistakes to Avoid
When making this cheesecake, a few common pitfalls can hinder your perfect dessert. Avoid these mistakes to ensure glorious results:
- Under-mixing the cream cheese: Taking shortcuts here may result in a lumpy texture. Ensure the cream cheese is softened fully; whip to achieve a smooth consistency before adding the sugar.
- Skipping the refrigeration: This dessert requires time to set after assembly. Neglecting this step can lead to a runny cheesecake when cut.
- Over-whipping the cream: While you want it fluffy, over-whipping can turn whipped cream into butter. Stop as soon as soft peaks form for the best texture.
What to Serve With No-Bake Blackberry Cheesecake
Serving your no-bake blackberry cheesecake with delightful companions enhances the entire experience. Here are some perfect pairings:
- Fresh mint leaves: Adds a refreshing aroma and natural flavor contrast.
- Vanilla ice cream: A scoop adds a delightful creaminess that complements the tangy cheesecake.
- Coffee or espresso: The rich bitterness of coffee perfectly balances the sweet notes of the cheesecake.
- Herbal tea: Try a soothing chamomile or mint tea for a light end to your meal.
- Chocolates or truffles: Decadent chocolates create a luxurious touch alongside the cheesecake.
- Fruit salad: A bright fruit salad offers a fresh, lighter contrast to the richness of the cheesecake.
- Cheese platter: An assortment of cheeses pairs well with the sweetness and complexity of the dessert.
Storage & Reheating Instructions
Store any leftover cheesecake in the fridge, tightly covered with plastic wrap or aluminum foil, for up to 5 days. If you want to keep it longer, you can freeze individual slices or the entire cheesecake for up to 3 months. Just wrap it carefully in plastic and foil to preserve freshness. To thaw, place it in the fridge overnight before serving. Reheating is unnecessary; this cheesecake is best enjoyed chilled.
Estimated Nutrition Information
Each slice of no-bake blackberry cheesecake provides approximately:
- Calories: 320
- Total Fat: 22g
- Saturated Fat: 11g
- Cholesterol: 80mg
- Carbohydrates: 28g
- Sugars: 16g
- Protein: 4g
This analysis provides an estimate; actual values will depend on the specific ingredients used.
FAQs
Can I use frozen blackberries instead of fresh?
Yes, frozen blackberries work in this recipe as long as you thaw and drain them before use. They may have more moisture, so adjust your cooking time accordingly for the topping.
Is there a dairy-free option available?
Absolutely! Substitute the cream cheese with a dairy-free alternative (like cashew cream) and use coconut whipped cream in place of regular whipped cream for a deliciously creamy dairy-free version.
Can I use a different type of crust?
Yes! While graham cracker provides a classic flavor, you can try an Oreo crust for a chocolatey twist or a nut-based crust for a gluten-free option.
How long does it take for the cheesecake to set?
Refrigerate the cheesecake for at least 4 hours. For the best results, letting it chill overnight allows all flavors to meld beautifully.
What’s the best way to slice the cheesecake?
For smooth slices, dip your knife in warm water and wipe it clean between cuts. This technique helps create clean edges and enhanced presentations.
Conclusion
As you wrap up this delightful adventure in creating a no-bake blackberry cheesecake, know that you’ve crafted more than just a dessert; you’ve created a moment of joy meant to be savored. With every creamy, berry-laden slice, you’ll indulge in a symphony of flavors that evokes the warmth of summer memories. Don’t wait—gather your ingredients and your loved ones, and treat them to this stunning cheesecake that promises smiles and satisfaction. Embrace the cool ease of no-bake desserts, and let this blackberry cheesecake become a beloved staple in your recipe book!
Print
No-Bake Blackberry Cheesecake
- Prep Time: 20 minutes
- Cook Time: 0 minutes
- Total Time: 240 minutes
- Yield: 8 servings 1x
- Category: Dessert
- Method: No-Bake
- Cuisine: American
- Diet: Vegetarian
Description
A luxurious no-bake blackberry cheesecake filled with creamy richness and topped with a fresh blackberry sauce.
Ingredients
- 1 1/2 cups graham cracker crumbs
- 1/2 cup unsalted butter, melted
- 2 cups cream cheese, softened
- 1 cup powdered sugar
- 1 teaspoon vanilla extract
- 1 1/2 cups whipped cream
- 2 cups fresh blackberries
- 1/4 cup sugar (for blackberry topping)
- 1 tablespoon lemon juice
Instructions
- Prepare the crust: In a mixing bowl, combine the graham cracker crumbs and melted butter. Stir until the crumbs are fully coated. Firmly press the mixture into the bottom of a 9-inch springform pan to form an even layer. Refrigerate for 10 minutes to set the crust.
- Make the filling: In another mixing bowl, beat the softened cream cheese with a mixer on medium speed until smooth and creamy. Gradually add the powdered sugar and vanilla extract, mixing until the mixture is completely combined and free of lumps.
- Incorporate whipped cream: Gently fold in the whipped cream using a spatula. Be careful not to overmix—this helps maintain the light and airy texture of the cheesecake.
- Combine layers: Pour the cream cheese filling over the chilled crust and smooth the top with your spatula for an even finish.
- Prepare the blackberry topping: In a saucepan over medium heat, combine the blackberries, sugar, and lemon juice. Cook until the blackberries break down and release their juices, thickening slightly—about 5-7 minutes. Allow the mixture to cool slightly.
- Assemble it all: Pour the cooled blackberry topping over the cheesecake, spreading it evenly.
- Chill: Place the assembled cheesecake in the refrigerator and let it set for at least 240 minutes or overnight for best results.
- Serve: After setting, carefully run a knife around the edge of the springform pan before removing the sides. Slice, serve, and enjoy chilled.
Notes
This cheesecake holds up beautifully in the refrigerator for up to 5 days or can be frozen for up to 3 months.
Nutrition
- Serving Size: 1 slice
- Calories: 320
- Sugar: 16g
- Sodium: 250mg
- Fat: 22g
- Saturated Fat: 11g
- Unsaturated Fat: 10g
- Trans Fat: 0g
- Carbohydrates: 28g
- Fiber: 1g
- Protein: 4g
- Cholesterol: 80mg


