
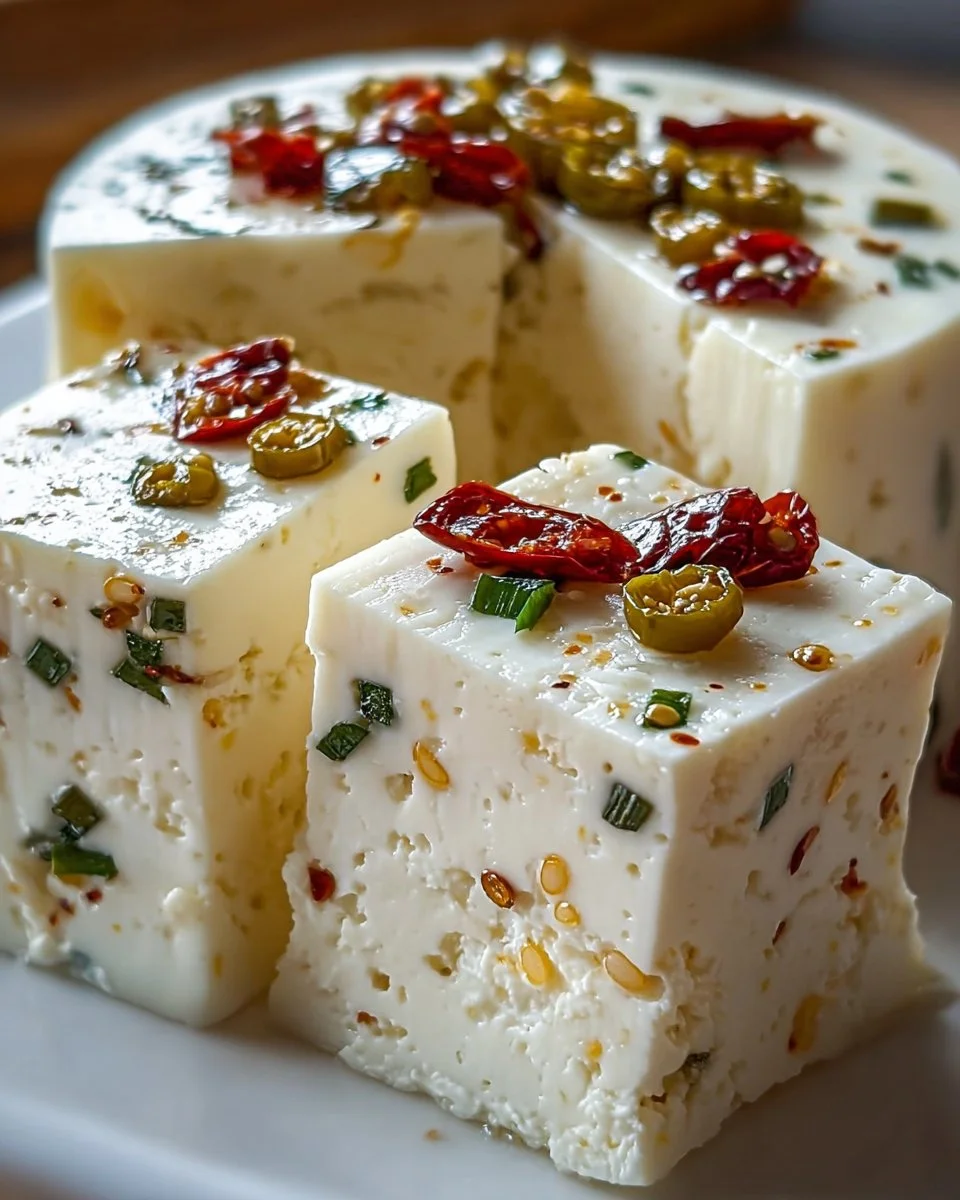
Indulging in the rich, creamy delight of Homemade Pepper Jack Cheese transports you to a cozy kitchen filled with warm aromas and bubbling pots. As the buttery, milky essence wafts through the air, your taste buds begin to dance in anticipation of that first bite. You imagine the smooth, velvety texture melding with the spicy kick of jalapeños—it’s an irresistible combination that promises not just flavor, but a truly multi-sensory experience. The allure of crafting your cheese, with its firm yet luscious character, becomes undeniably enticing as you think of how it can elevate any dish.
Picture yourself unwrapping a log of this homemade treasure, the soft embrace of the cheese yielding to your fingers, revealing a vibrant tapestry of color from the peppers. It’s not just cheese; it’s a celebration of flavor that invites you to gather around the table with friends and family. Whether you savor it on a cracker, layered in a sandwich, or melted atop a sizzling burger, every bite bursts with smoky, spicy goodness, making it a star player in your culinary repertoire.
Why You’ll Love This Homemade Pepper Jack Cheese
The love for Homemade Pepper Jack Cheese stems from an irresistible blend of flavors that promise to tickle your senses. The gentle heat of the jalapeños infuses each creamy morsel, making it perfect for both bold adventurers and those seeking a touch of excitement in their cheese. You’ll find that it complements a myriad of occasions: casual weekday dinners, vibrant gatherings with friends, or even a quiet movie night, this cheese transforms every bite into something extraordinary.
Beyond taste, crafting your cheese has its health benefits. Knowing exactly what goes into your food brings peace of mind, making this pepper jack cheese a wholesome snack. You control the spice level, so whether you desire a mild warmth or a fiery explosion, the power is in your hands. It stands out not only for its flavor but also for the hands-on experience that connects you with the food you create.
Preparation Phase & Tools to Use
Creating your own Pepper Jack Cheese requires a few essential tools, each playing a pivotal role in achieving that perfect texture and flavor.
- Large Pot: A heavy-bottomed pot ensures even heating of the milk, vital for preventing scorching.
- Thermometer: Precision is key! A food thermometer helps you monitor the milk’s temperature, aiming for that sweet spot of 190°F (88°C).
- Colander and Cheesecloth: This duo strains the curds from the whey effectively, allowing you to form cheese with the desired consistency.
- Mixing Bowl: Choose a bowl large enough to handle your cheese mixture while allowing easy mixing.
- Mold or Container: A shape for your cheese keeps it together as it sets. Any container with a lid works, but a cheese mold gives it that professional touch.
Preparation tips include working in a clean environment and using fresh ingredients. The fresher your milk, the richer the flavor.
Ingredients for Homemade Pepper Jack Cheese
- 2 quarts fresh milk: Whole milk yields a creamy cheese; alternatives like goat or sheep’s milk can also be used for unique flavors.
- 1/4 cup white vinegar: This helps curdle the milk; you can substitute with lemon juice for a different tang.
- 1/2 teaspoon salt: Enhances flavor and acts as a preservative.
- 1/2 teaspoon calcium chloride (optional): Useful for ensuring a firmer curd, especially with pasteurized milk.
- 1/2 cup diced jalapeños or spicy peppers: Adjust the amount to control the heat level—try bell peppers for a milder cheese.
- 1/4 teaspoon black pepper: Adds depth without overpowering the jalapeños.
- 1/4 teaspoon garlic powder: Introduces a warm undertone.
- 1/4 teaspoon onion powder: Provides a savory note.
- 1/4 teaspoon paprika: Adds a hint of smokiness.
- Cheesecloth for straining: Vital for separating curds and whey.
How to Make Homemade Pepper Jack Cheese
-
Heat the Milk: In a large pot, pour in the fresh milk and heat over medium, stirring frequently until it reaches 190°F (88°C). Keep a close eye; milk can boil over in an instant.
-
Add the Vinegar: Remove the pot from the heat, gently stirring in the white vinegar. Allow it to sit for 10-15 minutes. You’ll see curds forming; this is where the magic begins!
-
Strain the Curds: Line a colander with cheesecloth and pour the curds and whey into it. Let the whey drain out—this is key for achieving that desired cheese texture. Gather the cheesecloth corners, letting the curds rest for about five minutes to drain fully.
-
Rinse the Curds: Rinse the curds under cold water. Not only does this cool them down, but it also washes away any lingering vinegar taste, enhancing the final flavor.
-
Mix in Seasonings: Place the curds into mixing bowl and add salt, diced jalapeños, black pepper, garlic powder, onion powder, and paprika. Mix gently to combine, ensuring even distribution, but be careful not to break them down too much.
-
Mold the Cheese: Transfer the mixture into a mold or container. Press down firmly to eliminate air pockets, shaping the cheese as you wish.
-
Refrigerate and Solidify: Cover and refrigerate the cheese for at least 24 hours. This resting time allows the flavors to meld beautifully and the cheese to firm up.
-
Savor: Once set, slice your cheese and let the enjoyment commence! Ideal for sandwiches, burgers, or cheese boards.
Chef’s Notes & Helpful Tips
- Make-ahead Tips: Prepare the cheese in advance for gatherings; its flavor only improves with time!
- Cooking Alternatives: Explore using this cheese in cooked dishes like mac and cheese or pasta bakes for a smoky kick. You can also melt it in an air fryer for crispy cheese bites.
- Customization Ideas: Experiment with different spices, like cumin or chili powder, for a unique twist, or add herbs for freshness.
Common Mistakes to Avoid
Creating cheese at home can be thrilling, but avoiding pitfalls ensures a tasty outcome:
- Ignoring Temperature: Not heating the milk properly can lead to a weak curd. Always use a thermometer.
- Using Old Milk: Fresher milk yields better flavor; avoid anything close to its expiration date.
- Overmixing: Gentle mixing keeps the curds intact. Overworking them can change the texture to rubbery.
What to Serve With Homemade Pepper Jack Cheese
Pairing this delightful cheese can turn any meal into a fiesta:
- Crackers: Simple, crunchy crackers provide a perfect vehicle for the cheese’s richness.
- Fresh Vegetables: Crisp cucumber slices or crunchy bell peppers pair beautifully with the cheese’s heat.
- Grilled Meats: Layer it on burgers or serve with grilled chicken for a thrilling flavor explosion.
- Sandwiches: Elevate your classic sandwiches with slices of this cheese for incredible depth.
- Fruit: Pair with sweet fruits like pears or apples for an unexpected yet delicious contrast.
- Egg Dishes: Grate over omelets or scrambled eggs for breakfast that starts your day on a high note.
- Soups: Melt on top of spicy soups for a creamy contrast that will warm your soul.
- Nachos: Load it over tortilla chips for an ooey-gooey treat perfect for sharing.
Storage & Reheating Instructions
Once crafted, Homemade Pepper Jack Cheese deserves thoughtful storage. Wrap your cheese tightly in wax paper and place it in a plastic bag before refrigerating; it will last for about two weeks. For extended storage, you can freeze it—just remember to slice it first for easy thawing. Reheat pieces gently in the microwave or in dishes that require baking, allowing the cheese to come back to life.
Estimated Nutrition Information
Approximate per serving (1 oz):
Calories: 110
Total Fat: 9g
Saturated Fat: 6g
Cholesterol: 30mg
Sodium: 200mg
Carbohydrates: 1g
Protein: 7g
(Note: These values are estimates and may vary based on specific ingredients and methods used.)
FAQs
1. Can I adjust the spiciness of my cheese?
Absolutely! Modify the amount of jalapeños based on your heat preference, or use milder peppers for a gentle kick.
2. What milk is best for making cheese?
Whole milk gives the richest flavor and creaminess. However, exploring other types like goat or sheep’s milk can lead to delightful discoveries.
3. Is it possible to make vegan cheese?
Yes! For a plant-based version, consider using nut milk and tofu alongside nutritional yeast and spices to achieve a cheesy flavor profile.
4. How do I use this cheese in cooking?
It shines in sandwiches and burgers but also melts beautifully on top of casseroles, pasta dishes, or grilled vegetables.
5. Why did my cheese not form properly?
Several factors can contribute to this issue, such as incorrect temperature, old milk, or not enough acid added. Ensure you monitor each step closely for the best results.
Conclusion
In a world overflowing with store-bought options, nothing compares to the satisfaction of crafting your own Homemade Pepper Jack Cheese. This delightful journey elevates not just your snacking game but also connects you with the magic of home cooking. So gather your ingredients, roll up your sleeves, and embark on creating something truly magical. Once you experience the savory warmth enveloped in creamy goodness, you’ll understand the art of cheese-making like never before. Enjoy every delicious bite!
Print
Homemade Pepper Jack Cheese
- Prep Time: 15 minutes
- Cook Time: 30 minutes
- Total Time: 45 minutes
- Yield: 4 servings 1x
- Category: Cheese
- Method: Molding
- Cuisine: American
- Diet: Vegetarian
Description
Craft your own rich and creamy Homemade Pepper Jack Cheese infused with jalapeños, perfect for elevating any dish.
Ingredients
- 2 quarts fresh milk
- 1/4 cup white vinegar
- 1/2 teaspoon salt
- 1/2 teaspoon calcium chloride (optional)
- 1/2 cup diced jalapeños or spicy peppers
- 1/4 teaspoon black pepper
- 1/4 teaspoon garlic powder
- 1/4 teaspoon onion powder
- 1/4 teaspoon paprika
- Cheesecloth for straining
Instructions
- Heat the milk in a large pot over medium, stirring frequently until it reaches 190°F (88°C).
- Add the vinegar and let it sit for 10-15 minutes to form curds.
- Strain the curds through a colander lined with cheesecloth to remove whey.
- Rinse the curds under cold water to cool them and wash away the vinegar taste.
- Mix the curds with salt, jalapeños, black pepper, garlic powder, onion powder, and paprika in a bowl.
- Mold the mixture into a shape using a container or cheese mold.
- Refrigerate for at least 24 hours to firm up.
- Savor your cheese in sandwiches, burgers, or cheese boards.
Notes
Make ahead for gatherings, and try different spices for a unique twist.
Nutrition
- Serving Size: 1 ounce
- Calories: 110
- Sugar: 1g
- Sodium: 200mg
- Fat: 9g
- Saturated Fat: 6g
- Unsaturated Fat: 3g
- Trans Fat: 0g
- Carbohydrates: 1g
- Fiber: 0g
- Protein: 7g
- Cholesterol: 30mg


