

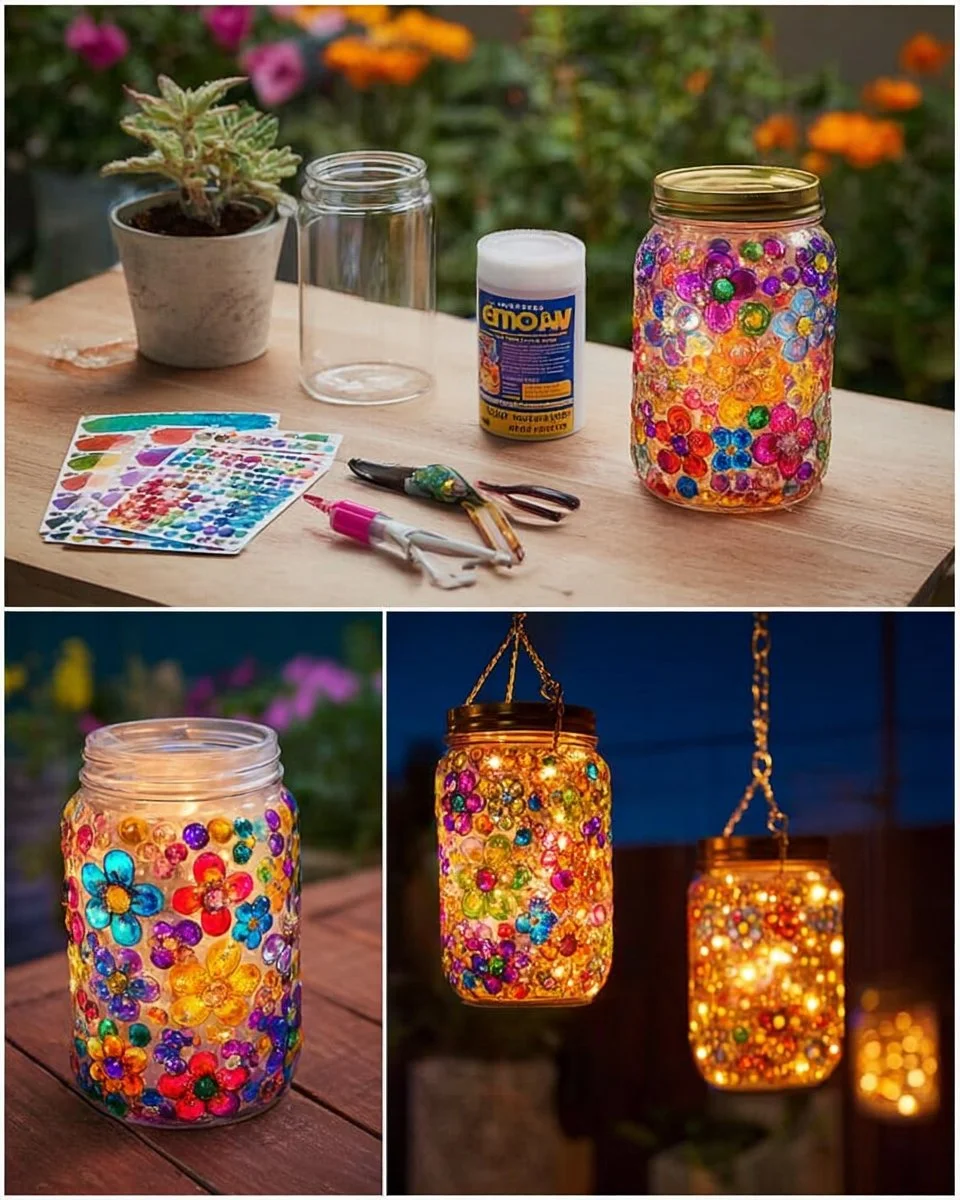
Illuminate Your Space with a Jeweled Mason Jar Lantern: A Crafting Adventure
Imagine a serene evening outside, the sun dipping below the horizon, draping everything in hues of amber and violet. Your backyard begins to glow with warmth and magic as you light up your gathering with a mesmerizing display of jeweled lanterns. This is more than just an aesthetic touch; it’s a canvas for your creativity, a spark for connection, and a sensory invitation to share stories under the stars.
Today, I’m excited to show you how to create your very own Jeweled Mason Jar Lantern—a project perfect for a garden party, romantic dinner, or simply to add a little charm to your home. Not only will these lanterns beautify your space, but they also become beacons of light that guide you and your loved ones through joyful moments together.
![Jeweled Mason Jar Lantern]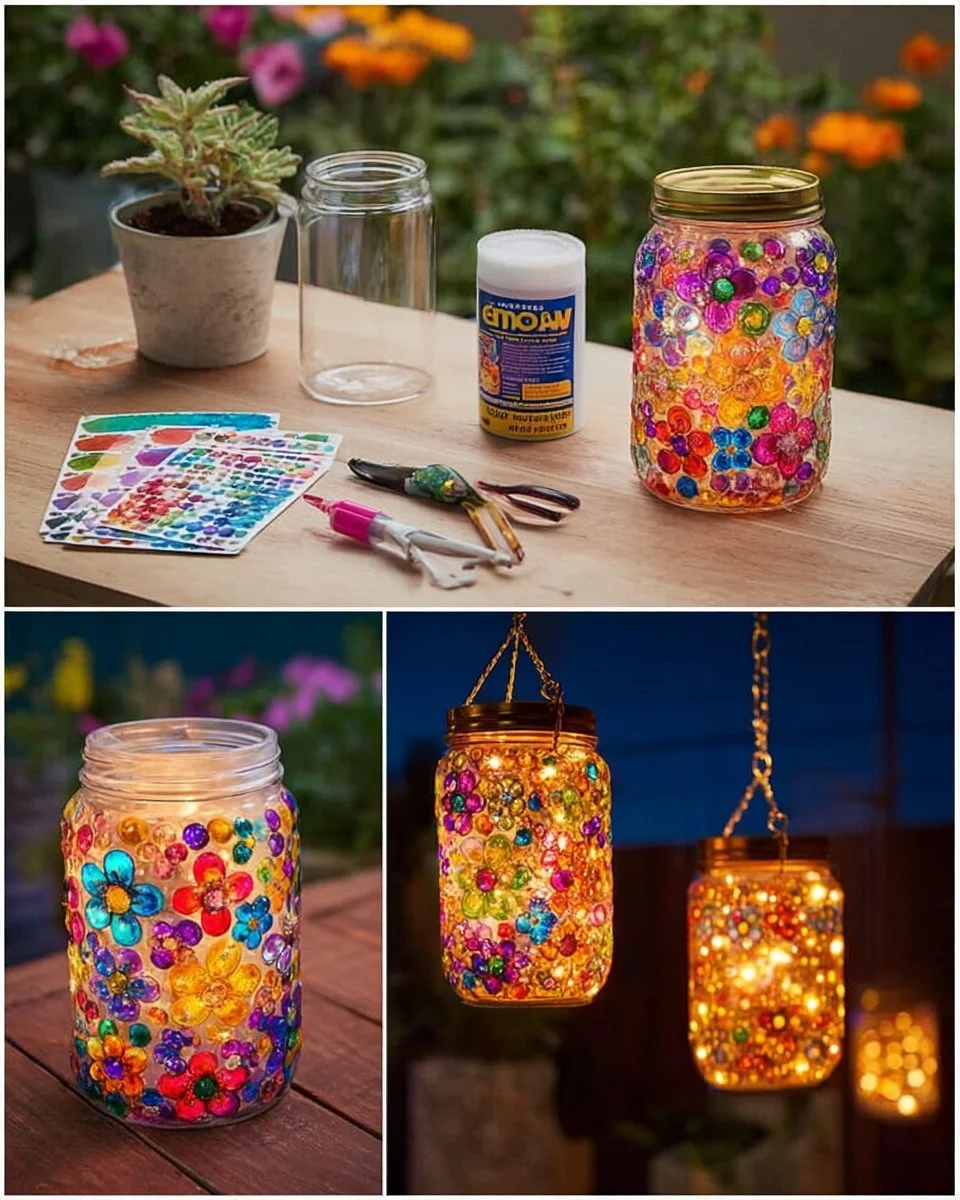
The Allure of Jeweled Mason Jar Lanterns
There’s something special about crafting decor items that shimmer and shine under the twilight sky. Jeweled mason jar lanterns embody that simplicity we crave with the added flair of glitz. When light shines through the gems and stickers you’ve painstakingly attached, each lantern transforms into a unique piece of art that tells a story.
People love this DIY project for several reasons. Firstly, it combines creativity with functionality. Secondly, it’s incredibly customizable—choose your favorite colors and designs! And lastly, it’s an accessible craft that anyone can tackle, whether you’re an experienced DIYer or just beginning.
Benefits and Perfect Occasions
What makes these jeweled lanterns a delightful choice is their versatility. They can serve as marvelous centerpieces for holiday gatherings, provide a soft glow for intimate dinners, or illuminate pathways during special events. Here are some occasions where these lanterns really shine:
- Garden Weddings: Create a romantic atmosphere with delicate jewel-toned lights illuminating the night.
- Birthday Parties: Add a festive touch to your décor with customizable colors matching the theme.
- Seasonal Decor: Use warm colors for fall evenings or cool blues for a winter wonderland.
- Casual Family Gatherings: Set the mood for laughter and storytelling around a backyard firepit.
Gathering Your Materials
Before diving headfirst into this crafty adventure, let’s gather the materials you will need. Each component has a role in bringing your vision to life:
- Glass mason jar: This classic element embodies rustic charm.
- Mod Podge: Essential for adhering gems and adding a protective layer.
- Clear craft glue: Perfect for securing any decorations that might need extra support.
- Self-adhesive acrylic gems: These will be the stars of your lantern, creating a dazzling effect.
- Pearl stickers and small rhinestones: Add texture and depth to your design.
- Paintbrush: For applying Mod Podge with precision.
- Tweezers: Handy for placing the smaller decorations.
- Decorative metal trim or chain hanger: To give your lantern a polished finish.
- LED tea light or fairy lights: The heart of your lantern pulls the entire project together.
Step-by-Step Instructions to Create Your Own Lantern
Step 1: Prepare Your Canvas
Before you begin crafting, it’s crucial to make sure your mason jar is spotless. Clean and dry the jar thoroughly; any residue could affect the adhesive’s grip. Take a moment to feel the texture of the glass, its weight in your hands—this is your blank canvas.
Step 2: Apply the Base Layer
Using a paintbrush, apply a thin layer of Mod Podge to the outside of the mason jar. Imagine this layer as a primer, prepping the surface for a magical transformation. Make sure to cover enough area to accommodate your acrylic gems.
Step 3: Create Your Design
Now comes the fun part—arranging your large acrylic gems! Start by creating flower patterns or clusters that catch your eye. Place them strategically around the jar as if you’re designing a blooming garden. Use your tweezers for precision; those intricate placements often require a gentle touch.
Step 4: Fill in the Gaps
Don’t forget about the empty spaces! Take your pearl stickers and small rhinestones to fill in the gaps. This is where the lantern begins to look alive with color and dimension. The varying textures will catch the light in different ways, enhancing the overall design.
Step 5: Secure Your Decorations
Once you’re satisfied with the arrangement, use clear craft glue to secure any decorations that seem unsteady. Allow the lantern to dry completely, ideally overnight to let the adhesive work its magic.
Step 6: Final Touches
After the glue has fully dried, it’s time to attach your decorative trim or chain hanger around the rim of the jar. This final detail gives your lantern a refined look, as it echoes the beauty of its jeweled body and establishes a way to display it.
Step 7: Light It Up
For the pièce de résistance, place an LED tea light or fairy lights inside the jar. With a gentle flick of a switch, watch as your lantern illuminates! You can hang it from a tree branch or place it on a table to share its glow.
Some Helpful Tips to Enhance Your Craft
- Experiment with Sizes: Use different gem sizes to create a stained-glass effect. Larger pieces could act as the focal points while smaller accents weave around them.
- Allow for Curing: Don’t rush—let your adhesive cure completely overnight. This ensures your masterpiece remains intact when it’s time to shine.
- Safety First: Always opt for LED lights instead of real candles to maintain a safe atmosphere—especially around fabric or dry foliage.
Common Beginner Mistakes to Avoid
One of the most common pitfalls is rushing through the drying process. Taking your time allows the craftsmanship to truly hold together. Also, be cautious with spacing—overcrowding your design can detract from the stunning effect of individual gems.
Creative Variations to Try
After your first lantern, consider mixing it up! Try using tinted spray paint inside the jar for an extra pop of color when lit. Or, bring seasonal themes into play—think shades of orange and red for fall, icy blues and whites for winter, or vibrant pastels for spring.
Displaying Your Lanterns
Place these jeweled lanterns along your garden path to welcome guests, or cluster a few together on a dining table for an enchanting effect. Imagine an evening where friends gather around, laughter drifting into the night, with the soft glow of your creations adding to the warmth of shared stories.
Conclusion: Crafting More Than Just a Lantern
As you embark on this crafting journey, let it serve as a reminder of the beauty found in creativity. Each jeweled mason jar lantern becomes a symbol of light—literally and figuratively—that brightens your space and coaxes your heart to connect with others. Your handiwork is not just a decorative piece but an invitation to create memories with those you cherish.
So, gather your materials, unleash your creativity, and light up your world with these enchanting lanterns. You won’t just be illuminating your home; you’ll also be crafting stories that will shimmer brightly for years to come.
SEO Meta Description
Discover the enchanting world of Jeweled Mason Jar Lanterns. This detailed guide walks you through crafting a stunning and unique decoration ideal for all occasions!
Suggested SEO Tags
- Jeweled mason jar lantern
- DIY lantern crafts
- Creative home decor
- Decorative lighting ideas
- Mason jar crafts
- Outdoor party decor
- Handmade gifts






