

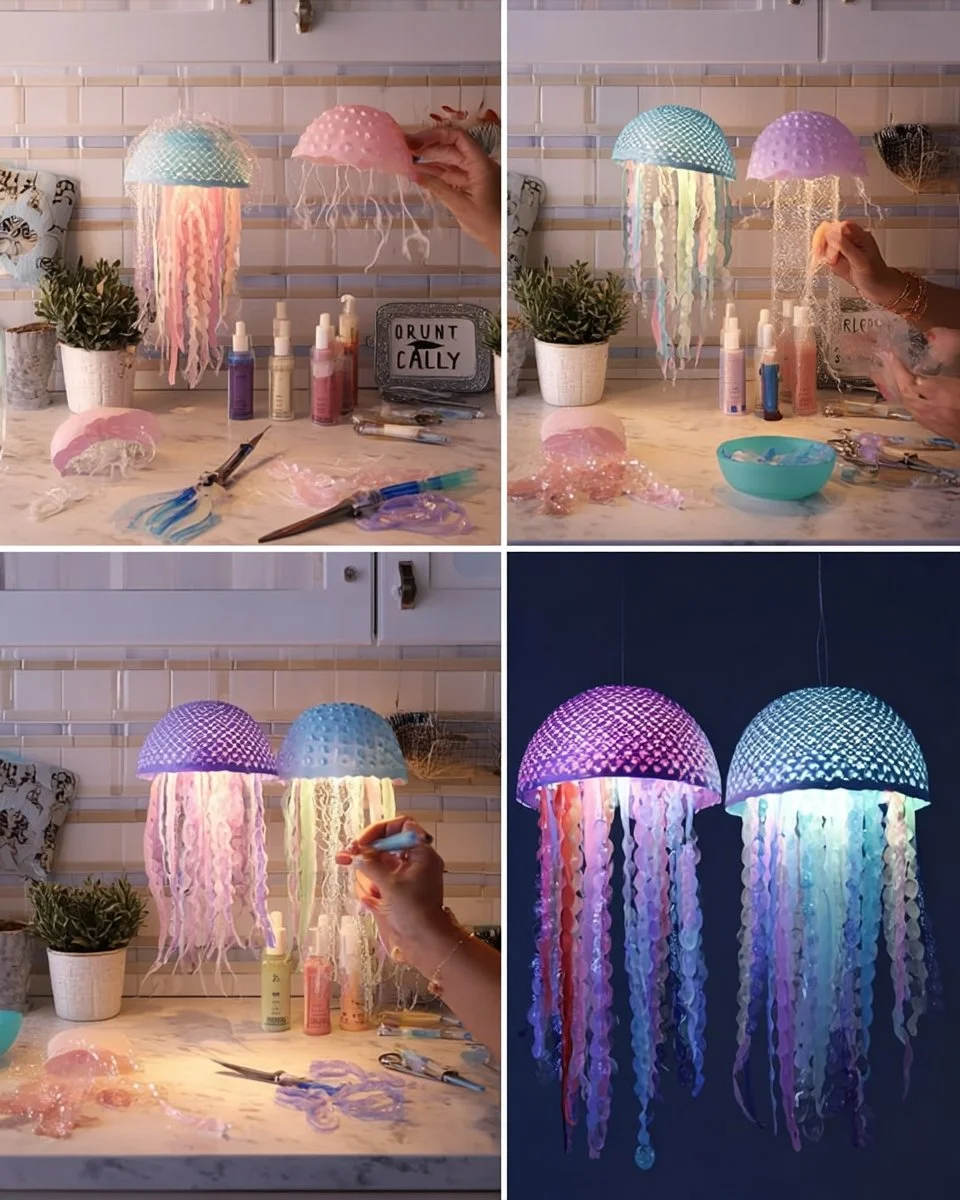
Embrace the Underwater Magic: Create Your Own Pastel Jellyfish Lights
Imagine stepping into a serene underwater world where the soft glow of pastel colors dances like gentle waves. It’s a scene that invites calmness and wonder, perfect for a dreamy evening atmosphere. Whether you’re hosting a unique party, seeking to brighten your child’s room, or wanting to add a touch of whimsy to a cozy corner, crafting pastel jellyfish lights can transform any space into an enchanting underwater paradise.
Why This DIY Project is So Loved
There’s a certain magic that surrounds jellyfish, isn’t there? Their ethereal movements and delicate beauty have inspired artists, storytellers, and dreamers for centuries. Making pastel jellyfish lights allows us to bring a bit of that elegance into our homes, encapsulating the fascination of aquatic life within our daily environments. Beyond aesthetics, this project offers the wonderful benefit of creativity—it’s a chance to express yourself through colors, textures, and design.
The Perfect Occasion for Pastel Jellyfish Lights
These delightful creations are versatile. Picture them illuminating a summer soirée, casting shimmering hues during a birthday bash, or even serving as soft night lights as your child drifts off to sleep. They can accentuate themes like mermaids, ocean adventures, or simply inject a breath of fresh air and color into any gathering. As the lights twinkle, they create an inviting ambiance, leading to conversations that float as freely as the jellyfish themselves.
Gather Your Materials
Before diving into the creative process, gather your crafting materials. Each item plays a crucial role in completing your pastel jellyfish lights, transforming simple colanders into luminous ocean wonders.
- Plastic colanders: These will form the body of your jellyfish.
- Pastel acrylic paint: Soft shades will evoke an underwater feel.
- Paintbrush: For coating your colanders with beautiful colors.
- Ribbon strips: These will serve as tentacles, swaying gracefully.
- Bead garlands: Add texture and dimension to your jellyfish.
- Fairy lights: The magic behind the glowing effect; battery-operated for convenience.
- Hot glue gun and glue sticks: Your primary adhesive tool.
- Scissors: A straightforward tool for cutting ribbons.
- Fishing line or string: For hanging the jellyfish.
- Battery pack for lights: Keep the glow alive!
Crafting Your Pastel Jellyfish Lights: Step by Step
Step 1: Prepare Your Armor
Before you unleash your creativity, ensure your plastic colanders are clean and dry. This step sets the foundation for a smooth painting process.
Step 2: Paint with Love
Grab your pastel acrylic paint and brush. Choose colors that connect with your vision—lavenders, baby blues, soft pinks, and mint greens. With every stroke, imagine your jellyfish floating through calm waters. Let them dry completely in a warm place; the anticipation will only add to the excitement!
Step 3: Illuminate from Within
Once your colanders are completely dry, it’s time to work some magic. Using your hot glue gun, carefully attach fairy lights inside each colander. The lights should twinkle like tiny stars beneath the surface, waiting to be shared with the world.
Step 4: Craft the Tentacles
Cut your ribbon strips into various lengths, varying the sizes to mimic real jellyfish tentacles. This variety gives your creation movement and elegance.
Step 5: Add Those Beautiful Textures
This is where the jellyfish comes alive! Glue the ribbons and bead garlands around the edge of the colander. Allow your imagination to roam—mix colors, textures, and lengths to create a captivating display.
Step 6: Secure Your Creation
Tie fishing line or string to the top of your jellyfish. This will allow you to easily hang them wherever you desire, transforming ceilings or walls into an underwater spectacle.
Step 7: Light Up Your World
The moment you’ve been waiting for! Turn on the lights and find the perfect spot to display your jellyfish creations. Watch as they glow softly, casting a dreamy ambiance that captivates hearts.
Tips for a Flawless Crafting Experience
To fully embrace the essence of the ocean, focus on using soft pastel colors. Mixing and matching ribbons and bead strands will create additional texture, enhancing your jellyfish’s charms. Moreover, utilizing battery-operated fairy lights ensures a hassle-free experience—no need to fuss over pesky cords!
Avoiding Common Pitfalls
While crafting, be mindful of using too much glue, as it can become messy and may affect the appearance of your project. Take your time, allowing each layer to dry before moving on to the next step for a polished final product.
Creative Variations to Explore
Your jellyfish lights can be tailored to suit your personal aesthetic. Consider using more vibrant colors for a bold statement or experimenting with different materials like tulle for a softer look. You could also integrate small seashells or starfish into the design for a unique twist, sparking conversations about your personal craft journey.
Presenting Your Craft
Once completed, consider how you’ll showcase your magnificent jellyfish lights. Hanging them in clusters can create a stunning focal point, while placing them on a shelf or in a corner will provide depth and charm, lighting up those tranquil spaces.
Frequently Asked Questions
-
Can I use a different type of colander?
Absolutely! While plastic colanders are recommended, any colander with a similar design can work. However, ensure it will properly hold the lights without being too heavy. -
How long do the fairy lights last?
Depending on the battery used, fairy lights usually last anywhere from 10 to 50 hours of continuous use. -
Can I wash my jellyfish lights after making them?
It’s best to keep them dry as much as possible. Wipe them down with a dry cloth if needed, but avoid submerging them in water.
Bringing Your Vision to Life
Creating pastel jellyfish lights is more than just a crafting project—it’s an emotional journey that reminds us of the beauty and tranquility of nature. As you hang your jellyfish, you invite that serene energy into your home, a gentle reminder of the beauty that surrounds us both in and out of water.
So, embrace your creativity, gather your materials, and let the calming hues of pastel colors whisk you away into an aquatic dreamland. This project is just waiting to brighten not only your room but also your spirit, inviting warmth and nostalgia into your space.
SEO Tags: #JellyfishLights, #DIYDecor, #OceanCrafts, #FairyLightCrafts, #CreativeDIY, #HomeDecor, #CraftingMagic






