

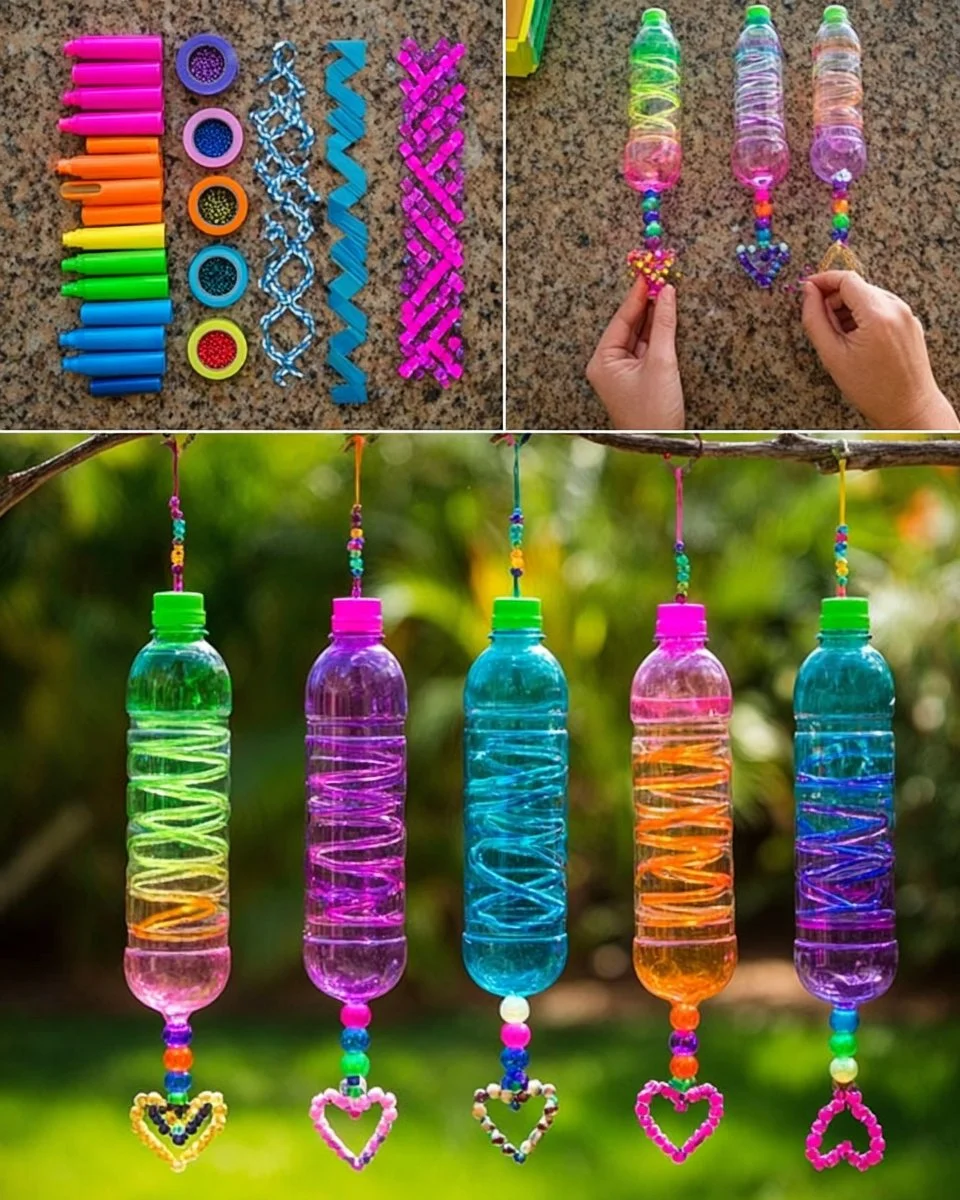
Create Magical DIY Plastic Bottle Spiral Wind Spinners
There’s something enchanting about the gentle rustling of wind chimes and the swirling dance of colorful decorations caught in the breeze. Picture a sunlit afternoon where vibrant colors swirl lazily in your garden—these are the moments that capture joy and whimsy in the simplest of ways. DIY projects have a unique way of stirring our creativity and infusing our spaces with personal touches, and that’s especially true with our craft today: the delightful DIY Plastic Bottle Spiral Wind Spinners.
These clever creations are not just a charming addition to your outdoor decor; they tell a story—your story. Made from items that could easily end up in the landfill, each spinner is a beautiful reminder of sustainability wrapped in creativity. Let’s dive into the world of crafting, where we’ll transform simple plastic bottles into mesmerizing spirals that twirl and twist on any gentle breeze.
Why People Love This Craft
The joy of creating your own decorations lies in the fact that it’s not just about crafting; it’s about making something uniquely yours. As the wind catches these spirals, you’ll feel a sense of pride, knowing that each spin was born from your own hands—your imagination brought to life! Plus, it’s a fantastic opportunity for family bonding. Imagine a lazy Sunday afternoon spent with loved ones, scissors in hand, brainstorming vibrant designs, and sharing laughter as you watch your creations flutter outdoors.
The best part? This project is incredibly versatile! Whether you want to embellish your garden, add flair to a child’s room, or craft something special for a birthday party, these colorful spinners will fit right in, making any occasion feel a bit more magical.
Benefits and Best Occasions to Use It
Creating DIY Plastic Bottle Spiral Wind Spinners has numerous benefits. First and foremost, it’s a sustainable endeavor—recycling plastic helps reduce waste and promotes eco-friendly practices. Furthermore, it enhances fine motor skills, encourages creativity, and serves as an excellent introduction to crafting for kids.
These wind spinners are perfect for birthday parties, outdoor gatherings, or simply to brighten your home garden. They can welcome guests in spring or dance in summer breezes, and even serve as charming autumn decor when painted in seasonal hues. Who wouldn’t love a personalized touch that changes with the seasons?
Materials Needed
Gathering your materials is half the fun! Here’s what you’ll need:
-
Empty plastic bottles: Clear ones work best as they showcase color through your designs. Look for bottles from juice, soda, or water. Each bottle can yield several spinners, so collect a few!
-
Permanent markers: Choose a vibrant array. Think bold and bright to make your spirals pop against the backdrop of nature.
-
Curly ribbon: Adds a playful touch, especially when spiraled around the bottles.
-
Scissors: Safety scissors for kids, or sharper ones for adults, to help make clean cuts.
-
Fishing line or string: This will be used for hanging your spinners securely.
-
Plastic beads: These will add an extra element of fun and color at the ends of your spinners.
-
Tape: Handy for attaching elements securely.
-
Small crystal or heart charms: To add a bit of sparkle and charm to your spinners.
Step-by-Step Instructions
Let’s get crafting! Follow these steps to create your own stunning spinners:
-
Prep Your Bottles: Start by washing and drying your plastic bottles thoroughly. This helps remove any residue or labels, giving you a clean slate for your masterpiece.
-
Create Your Spirals: Take the curly ribbon and wrap it around your bottle to get an idea of your spiral guidelines. Using your permanent markers, carefully trace out spiral lines. Feel free to play with width; wider spirals create slow, languid movements, while tighter spirals spin quickly.
-
Cut the Spirals: Using scissors, carefully cut along your marked spiral lines. This step can be exciting yet requires precision, so take your time! Each spiral will twist magically as you release it.
-
Let Your Creativity Shine: This is where the fun kicks into high gear. Use your markers to decorate the spirals, adding dots, stripes, or whimsical patterns. Be bold! Consider layering colors for visual depth.
-
Poke Holes for Hanging: At both the top and bottom of each spiral, use scissors to poke a small hole. This will be where you attach your hanging string.
-
Add Beads and Charms: Take the fishing line and thread a charming mix of plastic beads and mood-lifting charms onto it—think crystals that catch the sunlight or heart charms that radiate warmth. Tie one end to the top of your spiral and let the other dangle from the bottom.
-
Find the Perfect Spot: Choose a sunny spot outside where the wind can catch your spinners. Whether it’s among flowers, hanging by a tree, or on your porch, watch the parade of colors come alive as they twirl.
Helpful Tips
- Safety First: If kids are involved in your crafting session, always supervise with scissors and be mindful of small parts.
- Color Combinations: While neon colors are eye-catching, pastel combinations can be equally beautiful, particularly when layered for depth.
- Testing the Wind: Before deciding where to hang them, check how the wind flows through your yard. This will help you position your spirals to catch the best breeze!
Common Mistakes to Avoid
Don’t rush the decorating phase! It’s easy to get excited and want to complete the spinners quickly, but taking the time to craft each design carefully makes all the difference. Also, be sure to poke holes that are just large enough to thread the fishing line, and avoid cutting the spirals too tightly—this complicates the twirl!
Creative Variations
Feeling adventurous? Transform your spinners into themed decorations! For Halloween, consider painting them deep oranges and blacks. For a festive winter touch, use white glitter and snowflake designs. The sky (or your imagination) is the limit!
Presentation Ideas
Consider displaying your spinners in front of glass doors, inviting vibrant colors into your home. Their shapes and colors create an interactive decoration that dances beautifully with sunlight. You could even incorporate them into party decor—imagine them hanging at different heights, fluttering in the breeze, capturing the eyes of every guest.
Storage and Maintenance Tips
Although these spinners are durable, keeping them in shaded areas when not in use can help maintain their colors and integrity. If left out year-round, you may need to touch up the decorations occasionally with your markers.
Frequently Asked Questions
Q: How long do these wind spinners last?
A: Typically, a well-made spinner can last several months to a year, depending on the weather elements. For longer life, store them in sheltered areas during harsh weather.
Q: Can I use colored plastic bottles?
A: Absolutely! Colored bottles can add a unique touch to your design.
Conclusion
Crafting your own DIY Plastic Bottle Spiral Wind Spinners isn’t just about beautifying your backyard or spicing up your indoor decor; it’s a delightful journey of imagination and creativity that unites families and celebrates the essence of sustainability. So grab those bottles, gather your craft supplies, and let your inner artist soar. Make your outdoor spaces playful and interactive, allowing nature and human creativity to dance together beautifully. Remember, each spin not only captures the wind but also captures a little piece of your heart—an everlasting symbol of your creativity!






