
Crafting Love: The Magic of DIY Rainbow CD Wind Chimes
There’s something inexplicably charming about the tinkling sound of a wind chime catching the breeze. It transports us to moments of carefree summer afternoons, where laughter mingles with the gentle rustling of leaves. If you’re seeking a perfect blend of nostalgia and creativity, making a rainbow CD wind chime sun catcher might just become your new favorite project. Not only does it bring beauty and color to your outdoor spaces, but it’s also a fabulous way to repurpose old materials and infuse your home with a personal touch.
As I settled down at my crafting table one sunny afternoon, the light danced through my kitchen window—a twinkling invitation to create. The idea of transforming old CDs, which had long been tucked away, into a stunning wind chime sparked joy in me. Picture this—donning your favorite crafting apron, scissors and beads scattered across the table, and that sweet sound of a gentle breeze cutting through the air as your creation begins to take shape. Before you know it, you’ll have a magical piece that not only catches the sunlight but also tells a story of creativity and care.
Why People Love This Project
Creating a rainbow CD wind chime isn’t merely about craft; it’s about the experience, the colors, and the joy of making something beautiful with your own hands. There’s a deep sense of gratification that comes from transforming something old and unused into something fresh and eye-catching. Each piece of the wind chime can be a reflection of your style—vivid splashes of color, the soothing sound of chimes, and the playful dance of sunlight through the recycled CDs create a magical atmosphere.
Moreover, this project serves as a fantastic way to bond with friends or family. Whether it’s a rainy weekend indoors or a sunny day in the yard, crafting together fosters connections and produces lasting memories. Plus, it’s an eco-friendly project that promotes sustainability by keeping materials out of the landfill—truly a win-win!
The Benefits of Crafting Wind Chimes
Not only do wind chimes look beautiful, but they also provide several benefits:
- Aesthetic Appeal: They enhance your garden or porch decor with vibrant colors and reflections.
- Sound Therapy: The gentle sound of a chime swaying in the wind can be soothing—a natural remedy for stress.
- Personalization: Each wind chime can be a unique testament to your creativity, allowing you to add your personal flair.
So, let’s gather our materials and dive into this colorful journey!
Materials You’ll Need
Before you dive into the magical world of wind chimes, gather the following materials:
- Old CDs: The stars of this crafting show! Old, unused CDs can become colorful chime pieces.
- Scissors: Perfect for cutting the CDs into your desired shapes.
- Hole Punch: To create holes for hanging your beautiful creations.
- Colorful Acrylic Beads: These will add a stunning pop and sparkle between the chimes.
- Jump Rings: Essential for connecting various parts of your hanging strands securely.
- Fishing Line or Jewelry Wire: Use this to thread your pieces together effectively—opt for strong fishing line for outdoor durability.
- Metal Ring or Embroidery Hoop: This will serve as the base from which your chimes hang.
- Pliers: A handy tool for securing connections.
Step-by-Step Instructions
Now that we have our materials ready, let’s bring your wind chime vision to life with these easy-to-follow steps.
-
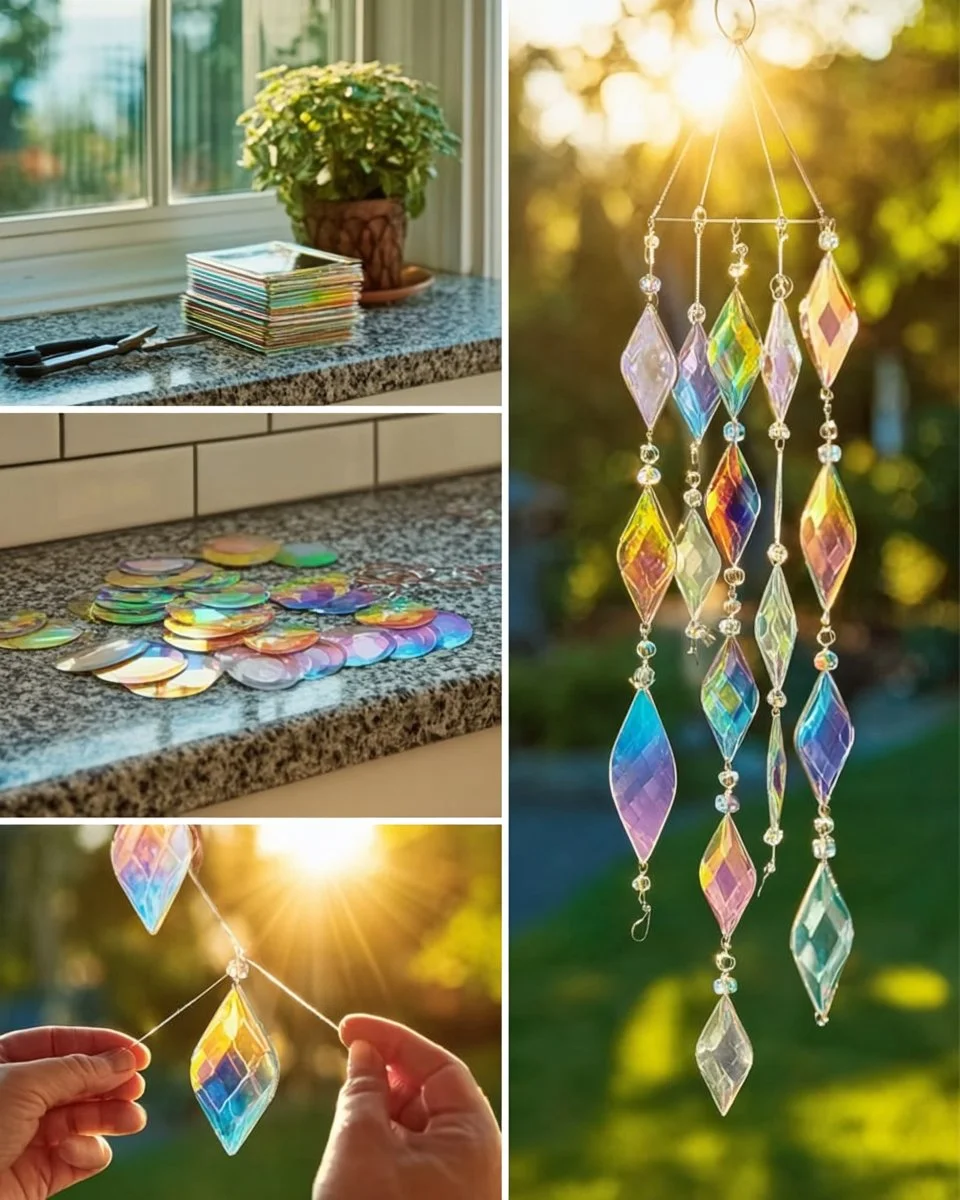
Cut the CDs: Begin by making creative cuts into your old CDs! Scissors in hand, cut them into various sizes of diamond and teardrop shapes. The beauty of this project is that there are no rules—let your imagination run wild! Picture these shapes glistening in the sun’s rays, turning your outdoor space into a vibrant rainbow of colors.
-
Punch the Holes: Using your hole punch, make a small hole at the top and bottom of each CD piece. This is where your fishing line will thread through, creating the strands you’ll later hang from your metal ring.
-
Thread the Beads and CD Pieces: Here comes the fun part! Take your fishing line and begin threading on the beads and CD pieces. Alternate between colors and shapes for a visually stunning arrangement. Feel the excitement grow as you see your creation coming together, reflecting your unique style.
-
Create Several Strands: Vary the lengths of your strands as you work. This adds dimension and visual interest to your wind chime. Keep placing your pieces until you have several hanging strands ready to dazzle.
-
Attach to the Metal Ring: Take your prepared strands and attach the top of each one to a metal ring or embroidery hoop. Use a jump ring here for a secure connection. The anticipation builds as you start to see the structural form of your wind chime!
-
Secure the Connections: Now, grab your pliers and ensure all connections are tight and secure by gently closing the jump rings. This step is crucial to avoiding any mishaps when hanging your beautiful creation outdoors.
-
Hang Your Creation: Finally, the time has come! Choose a spot outdoors where sunlight can shine through, capturing the beams to create beautiful reflections. Whether it’s your garden, patio, or balcony, find a spot that truly showcases your handmade treasure.
Tips for a Successful Wind Chime
As you embark on this crafting journey, keep these helpful tips in mind:
- Safety First: Always wear safety glasses when cutting CDs to protect your eyes from sharp edges.
- Choose Strong Line: Opt for durable fishing line to withstand the outdoor elements; it ensures longevity and durability for your chime.
- Sunlight is Key: Hang your wind chime in a spot where direct sunlight can highlight its beauty. The shimmering colors will bring joy to anyone passing by.
Beginner Mistakes to Avoid
For those new to crafting, a couple of common pitfalls may arise. Avoid cutting CDs too large, as they might become unwieldy when hanging. Also, ensure your holes are large enough for the fishing line but not so large that the pieces slip off. A little patience will yield a stunning masterpiece!
Creative Variations
Feeling adventurous? Why not explore a few creative variations to personalize your wind chime even further? Consider adding:
- Natural Elements: Incorporate seashells, wooden beads, or even twigs to blend nature with your colorful creations.
- Themed Chimes: Create goal-oriented designs—like beachy tones for a coastal theme, or soft pastels for a serene aesthetic.
- Personal Mementos: Include small trinkets that hold sentimental value, creating a wind chime that tells your story.
Maintenance Tips
Once your wind chime is blessing your space with tones of tranquility, it’s essential to keep it looking its best. Regularly check for any loose connections, especially after windy days, and gently wipe the CD pieces with a damp cloth to keep them sparkling.
Frequently Asked Questions
Q: How long does it take to create this wind chime?
A: Depending on how elaborate you choose to be, setting aside an afternoon should do the trick—while enjoying some snacks and good company, of course!
Q: Will this chime survive harsh weather?
A: If you use strong fishing line and secure your connections well, your wind chime should endure various outdoor conditions. Just relocate it during really severe weather if needed!
Embracing the Crafting Spirit
As your rainbow CD wind chime dangles and dances in the gentle breeze, take a moment to appreciate not just the beauty it brings, but the stories woven into every strand. Each bead, each glimmering piece is a memory shared, reflecting laughter, creativity, and connection. So find your sunny spot, hang up your creation, and rejoice in the simple pleasure of a shimmering, musical masterpiece that sings with joy!
SEO Meta Description
Discover the enchanting craft of creating a rainbow CD wind chime sun catcher! This detailed guide walks you through materials, instructions, and tips for an eco-friendly DIY project that brightens any outdoor space.
Suggested SEO Tags
- DIY wind chime
- Rainbow crafts
- Upcycled crafts
- Eco-friendly projects
- Garden decor
- Family crafts
- Colorful home accessories
So gather your materials, let your creativity soar, and watch as your space transforms into a kaleidoscope of sound and light!


