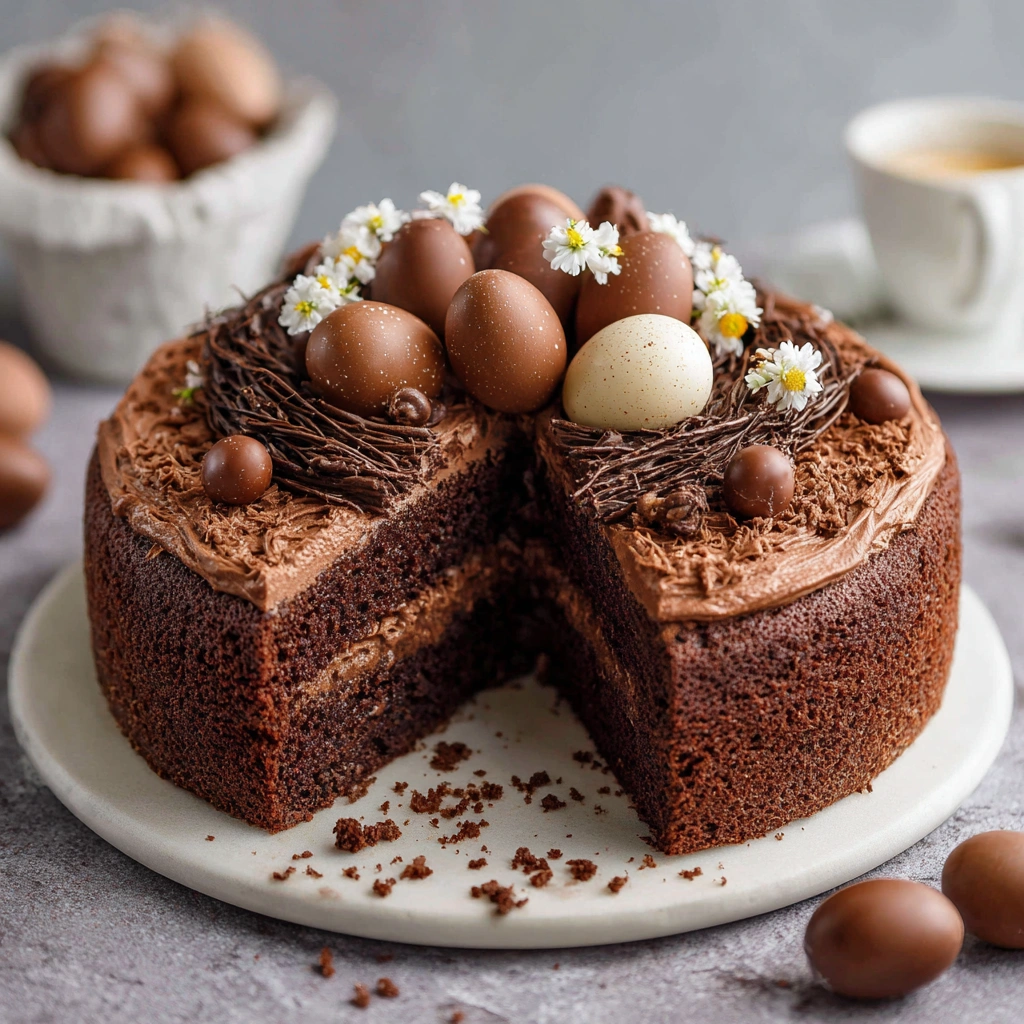
Introduction to Chocolate Easter Egg Nest Cake
As Easter approaches, I find myself dreaming of festive treats that bring joy to my family. The Chocolate Easter Egg Nest Cake is one such delight that never fails to impress. It’s not just a cake; it’s a celebration on a plate! This recipe is perfect for busy moms like us, offering a quick solution to create something special without spending hours in the kitchen. With its rich chocolate flavor and whimsical nest design, it’s sure to be a hit at any gathering. Let’s dive into this delightful adventure together!
Why You’ll Love This Chocolate Easter Egg Nest Cake
This Chocolate Easter Egg Nest Cake is a true crowd-pleaser! It’s incredibly easy to whip up, making it perfect for those busy days when you want to impress without the stress. The rich, moist chocolate cake pairs beautifully with the sweet coconut and colorful chocolate eggs, creating a festive treat that’s as delightful to look at as it is to eat. Trust me, your family will be asking for seconds!
Ingredients for Chocolate Easter Egg Nest Cake
Gathering the right ingredients is the first step to creating this delightful Chocolate Easter Egg Nest Cake. Here’s what you’ll need:
- All-purpose flour: This forms the base of your cake, giving it structure and a light texture.
- Granulated sugar: Sweetens the cake and helps create that lovely moist crumb.
- Unsweetened cocoa powder: Adds rich chocolate flavor; for a deeper taste, consider using dark cocoa.
- Baking powder: This leavening agent helps the cake rise, making it fluffy and light.
- Baking soda: Works alongside baking powder to ensure a perfect rise.
- Salt: Just a pinch enhances the flavors and balances the sweetness.
- Large eggs: They bind the ingredients together and add moisture.
- Milk: Contributes to the cake’s tenderness and richness.
- Vegetable oil: Keeps the cake moist; you can substitute with melted butter for a richer flavor.
- Vanilla extract: A splash of this adds warmth and depth to the cake.
- Boiling water: This may seem unusual, but it helps to bloom the cocoa, intensifying the chocolate flavor.
- Chocolate frosting: A luscious layer that brings everything together; feel free to use store-bought or homemade.
- Shredded coconut: This creates the nest effect and adds a delightful texture.
- Chocolate eggs: These are the finishing touch, making your cake festive and fun!
For exact measurements, check the bottom of the article where you can find everything listed for easy printing. Happy baking!
How to Make Chocolate Easter Egg Nest Cake
Now that we have our ingredients ready, let’s get to the fun part—making the Chocolate Easter Egg Nest Cake! Follow these simple steps, and you’ll have a delightful dessert that will wow your family and friends.
Step 1: Preheat and Prepare
First things first, preheat your oven to 350°F (175°C). This ensures your cake bakes evenly. While the oven warms up, grease two 9-inch round cake pans. I like to use a bit of vegetable oil or butter to make sure the cakes slide out easily later.
Step 2: Mix Dry Ingredients
In a large bowl, combine the all-purpose flour, granulated sugar, unsweetened cocoa powder, baking powder, baking soda, and salt. Whisk them together until they’re well blended. This step is crucial because it helps distribute the leavening agents evenly, ensuring a fluffy cake.
Step 3: Add Wet Ingredients
Now, it’s time to add the wet ingredients! Crack in the large eggs, pour in the milk, vegetable oil, and vanilla extract. Mix everything together until it’s smooth and well combined. Don’t worry if the batter looks a bit thick; that’s perfectly normal!
Step 4: Combine with Boiling Water
Here’s where the magic happens! Carefully stir in the boiling water. This step might seem odd, but it helps to bloom the cocoa powder, intensifying that rich chocolate flavor. Your batter will be quite thin, but that’s exactly what we want for a moist cake.
Step 5: Bake the Cakes
Pour the batter evenly into your prepared cake pans. Pop them into the preheated oven and bake for 30-35 minutes. To check if they’re done, insert a toothpick into the center. If it comes out clean, your cakes are ready to come out!
Step 6: Cool the Cakes
Once baked, let the cakes cool in the pans for about 10 minutes. Then, gently transfer them to wire racks to cool completely. This step is important because frosting a warm cake can lead to a melty mess!
Step 7: Frost and Decorate
Once your cakes are completely cool, it’s time to frost! Spread a generous layer of chocolate frosting on top of one cake layer, then place the second layer on top. Cover the entire cake with frosting, creating a smooth finish. Now, press shredded coconut around the sides and top to create that adorable nest effect. Finally, decorate with colorful chocolate eggs for a festive touch!
Tips for Success
- Make sure all ingredients are at room temperature for better mixing.
- Use a toothpick to check for doneness; it should come out clean.
- Let the cakes cool completely before frosting to avoid melting.
- For a fun twist, try adding mini marshmallows to the coconut nest.
- Store leftovers in an airtight container to keep them fresh.
Equipment Needed
- Two 9-inch round cake pans (or use one 9×13-inch pan for a single layer).
- Mixing bowls (a large one for dry ingredients and a medium one for wet).
- Whisk or electric mixer (a whisk works just fine if you prefer a workout!).
- Measuring cups and spoons for accuracy.
- Cooling racks to let your cakes breathe.
Variations
- For a gluten-free option, substitute all-purpose flour with a 1:1 gluten-free baking blend.
- Add a hint of espresso powder to the batter for a deeper chocolate flavor.
- Swap shredded coconut for crushed graham crackers for a different texture.
- Use white chocolate frosting instead of chocolate for a sweet contrast.
- Incorporate fresh berries between the layers for a fruity twist.
Serving Suggestions
- Pair the Chocolate Easter Egg Nest Cake with a scoop of vanilla ice cream for a delightful contrast.
- Serve with fresh berries on the side for a pop of color and freshness.
- For drinks, consider a rich coffee or a light sparkling lemonade.
- Present the cake on a decorative platter, garnished with extra chocolate eggs for a festive touch.
FAQs about Chocolate Easter Egg Nest Cake
As you embark on your baking adventure with the Chocolate Easter Egg Nest Cake, you might have a few questions. Here are some common queries I’ve encountered, along with helpful answers to guide you along the way.
Can I make this cake ahead of time?
Absolutely! This cake can be made a day in advance. Just store it in the refrigerator after frosting to keep it fresh. It’s a great way to save time on the day of your celebration!
What can I use instead of coconut?
If coconut isn’t your thing, you can swap it out for crushed graham crackers or even chopped nuts. Both options will still give you that delightful nest effect while adding a unique twist!
How do I store leftovers?
To keep your Chocolate Easter Egg Nest Cake fresh, store it in an airtight container at room temperature for up to three days. If you need to keep it longer, refrigerate it for up to a week.
Can I freeze this cake?
Yes, you can freeze the cake! Just wrap it tightly in plastic wrap and then in aluminum foil. It can be frozen for up to three months. Thaw it in the fridge overnight before serving.
What’s the best way to decorate the cake?
For a festive touch, use colorful chocolate eggs and additional shredded coconut to enhance the nest effect. You can also add edible flowers for a beautiful springtime presentation!
Final Thoughts
Baking the Chocolate Easter Egg Nest Cake is more than just a recipe; it’s a joyful experience that brings families together. The delightful aroma of chocolate fills your kitchen, creating a warm atmosphere that invites everyone to gather around. Watching the smiles on my loved ones’ faces as they take their first bite is truly priceless. This cake is a celebration of love, creativity, and the sweet moments we cherish. So, whether it’s for Easter or just a special day, I hope this cake brings as much joy to your home as it does to mine!
Print
Chocolate Easter Egg Nest Cake: A Delightful Treat Awaiting You!
- Prep Time: 20 minutes
- Cook Time: 35 minutes
- Total Time: 1 hour 55 minutes
- Yield: 12 servings 1x
- Category: Dessert
- Method: Baking
- Cuisine: American
- Diet: Vegetarian
Description
A delightful and festive Chocolate Easter Egg Nest Cake perfect for celebrating Easter with family and friends.
Ingredients
- 1 ½ cups all-purpose flour
- 1 cup granulated sugar
- ½ cup unsweetened cocoa powder
- 1 tsp baking powder
- ½ tsp baking soda
- ½ tsp salt
- 2 large eggs
- 1 cup milk
- ½ cup vegetable oil
- 2 tsp vanilla extract
- 1 cup boiling water
- 1 cup chocolate frosting
- 2 cups shredded coconut
- Chocolate eggs for decoration
Instructions
- Preheat the oven to 350°F (175°C) and grease two 9-inch round cake pans.
- In a large bowl, mix together the flour, sugar, cocoa powder, baking powder, baking soda, and salt.
- Add the eggs, milk, vegetable oil, and vanilla extract to the dry ingredients and mix until well combined.
- Stir in the boiling water until the batter is smooth.
- Pour the batter evenly into the prepared cake pans.
- Bake for 30-35 minutes or until a toothpick inserted in the center comes out clean.
- Let the cakes cool in the pans for 10 minutes, then transfer to wire racks to cool completely.
- Once cooled, spread chocolate frosting on top of one cake layer, then place the second layer on top.
- Cover the entire cake with chocolate frosting.
- Press shredded coconut around the sides and top of the cake to create a nest effect.
- Decorate with chocolate eggs on top of the coconut nest.
Notes
- For a richer chocolate flavor, use dark cocoa powder.
- Make sure the cakes are completely cooled before frosting to prevent melting.
- This cake can be made a day in advance and stored in the refrigerator.
Nutrition
- Serving Size: 1 slice
- Calories: 350
- Sugar: 30g
- Sodium: 200mg
- Fat: 15g
- Saturated Fat: 5g
- Unsaturated Fat: 8g
- Trans Fat: 0g
- Carbohydrates: 50g
- Fiber: 2g
- Protein: 5g
- Cholesterol: 40mg