
There’s something undeniably comforting about the smell of freshly baked bread wafting through the kitchen. Imagine sinking your teeth into a warm piece of bread, the crust cracking softly under the pressure, revealing a tender, fluffy interior. It’s like a warm embrace on a chilly evening. This No-Oven Stovetop Bread invites you to create this experience without the need for an oven, which means you can bring the magical aroma of fresh bread to life anytime you desire, even on a busy weekday.
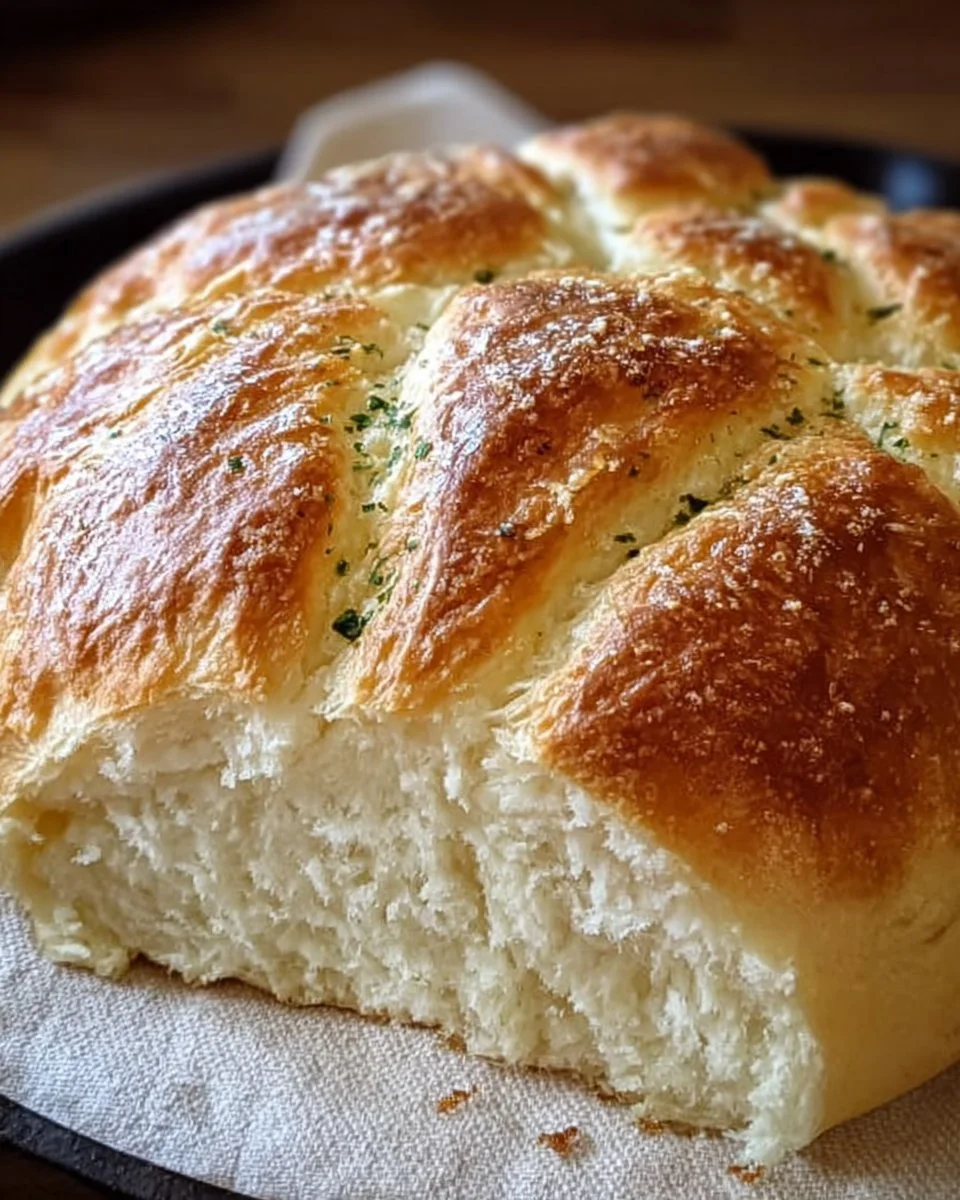
Picture this: you slice into the golden-brown crust, and the tantalizing aroma envelops you, promising a delightful blend of savory and slightly sweet flavors. The texture is a heavenly dance between the warmth of the interior and the slight crispness of the outside. Each bite melts in your mouth, leaving behind a faint echo of buttery richness. It’s the kind of bread that you can’t help but enjoy straight off the skillet, perhaps slathered with a pat of creamy butter or a drizzle of honey. This bread is not just food; it’s an experience that invites sharing, laughter, and comfort.
So, what makes this No-Oven Stovetop Bread so irresistible? Unlike traditional breads that require a long, painstaking process, this stovetop version offers simplicity without sacrificing flavor or comfort. Whether you’re toggling between work-from-home duties or unwinding after a long day, this recipe provides a quick escape into the world of homemade goodness. Perfect for brunch with friends, a cozy dinner with family, or simply as a personal indulgence, this bread elevates any occasion. The moment you take that first bite, you’ll understand why it stands out.
Why You’ll Love This No-Oven Stovetop Bread
This bread comes with a myriad of benefits. First and foremost, it eliminates the need for an oven, thus saving energy and time. You’ll appreciate how quickly you can go from craving bread to satisfying that urge in under 30 minutes. Moreover, its flavor profile is flexible; this recipe serves as a blank canvas just waiting for your touch. Add herbs, spices, or even cheese to customize each batch, and your imagination becomes the limit!
Ideal for brunch gatherings, dinner parties, or simply as a delicious addition to your weekday meals, No-Oven Stovetop Bread makes the perfect companion for soups, stews, or dips. Its versatility knows no bounds. Whether you pair it with rich, hearty dishes or use it to mop up every last bit of sauce, one bite beckons you for another.
Preparation Phase & Tools to Use
Creating your perfect loaf of No-Oven Stovetop Bread starts with gathering a few essential tools that play a critical role in ensuring each piece turns out divine.
- Mixing Bowl: A large, sturdy bowl allows ample space for combining ingredients while maintaining minimal mess.
- Wooden Spoon: This trusty kitchen companion gives you the strength to mix your dough without the risk of damaging your bowl.
- Floured Surface: A clean counter or cutting board provides the ideal surface for kneading, ensuring your dough comes together flawlessly.
- Non-Stick Skillet: The hero of this recipe, a non-stick skillet or frying pan ensures your bread cooks evenly without sticking, allowing for a golden-brown crust.
- Spatula: A flexible spatula is perfect for flipping your bread without damaging that delightful crust.
Preparation tips are equally important. Gather your ingredients before you start. Having everything ready allows you to work efficiently, giving you time to enjoy the process. Don’t rush when kneading; take a moment to get the dough’s consistency just right.
Ingredients for No-Oven Stovetop Bread
- 2 cups all-purpose flour: This versatile ingredient forms the base of your bread. You can also use whole wheat flour for a heartier texture.
- 1 tablespoon baking powder: This magic ingredient allows the bread to rise and provides a light, airy quality.
- 1 teaspoon salt: This essential seasoning enhances the overall flavors in your bread, elevating it from simple to scrumptious.
- 1 tablespoon sugar: A touch of sweetness adds depth to the flavor. You may substitute with honey or agave syrup.
- 3/4 cup milk: The moisture in milk gives the dough its necessary softness. Replace it with almond or oat milk for a dairy-free option.
- 2 tablespoons melted butter: This adds richness and helps achieve that delectable golden-brown crust. Substituting with olive oil can lend a unique flavor.
- Extra butter for cooking: Ensuring a crispy finish, extra butter lends an indulgent flavor.
How to Make No-Oven Stovetop Bread
- In a large bowl, mix together the flour, baking powder, salt, and sugar until combined. Consider adding dried herbs or garlic powder for an aromatic twist.
- Pour in the milk and melted butter. Stir until a dough forms, combining well but not overworking it.
- Lightly flour your surface and knead the dough for about 3–5 minutes until it feels smooth and pliable. This step is crucial for developing the bread’s texture.
- Divide the dough into small balls, about the size of a golf ball. Each ball will become a delightful mini loaf.
- Heat a non-stick skillet over medium heat. Add a small pat of butter to the skillet, allowing it to melt and coat the bottom.
- Flatten each ball slightly with your hand and place them in the skillet without overcrowding; they need space to rise and expand.
- Cook each side for about 4–5 minutes, or until they turn golden brown. You’ll know they’re ready when your kitchen fills with that inviting aroma.
- For a finishing touch, serve warm with butter and honey, relishing the warmth that radiates from each piece.
Chef’s Notes & Helpful Tips
- Make-ahead tips: Consider prepping your ingredients the evening before. Measure out your flour, sugar, and baking powder in a bowl ahead of time. This way, you can whip up your dough in mere minutes.
- Cooking alternatives: If stovetop isn’t your style, an air fryer can also make delightful mini loaves. Set the temperature to 350°F and cook for about 8-10 minutes for perfectly crispy results.
- Customization ideas: Experiment with flavors! Add grated cheese, chopped herbs, or chopped jalapeños to your dough for a savory twist. Sweet options include adding chocolate chips or cinnamon to the mix, creating a delightful treat for breakfast or dessert.
Common Mistakes to Avoid
- Over-kneading: While you want a smooth dough, excessive kneading can make your bread tough. Aim for just enough until the dough is smooth.
- Under-measuring flour: Using less flour than required can lead to sticky dough. Always make sure to accurately measure your ingredients.
- Inadequate heat: Make sure your skillet heats evenly before placing the dough; otherwise, your bread may burn before cooking through.
What to Serve With No-Oven Stovetop Bread
- Rich soups: Pair your bread with creamy tomato basil soup for a heartwarming meal.
- Savory stews: Enjoy it alongside beef stew or vegetable curry to soak up those delicious flavors.
- Charcuterie boards: Place it on a board with assorted cheeses, cured meats, and olives to entice your guests.
- Salads: This bread offers a perfect crunchy accompaniment to hearty salads tossed with tangy vinaigrettes.
- Egg dishes: A wonderful side for scrambled eggs or an omelet, enhancing breakfast with style.
- Spreads and dips: Serve it with hummus, herbed cream cheese, or garlic butter for an irresistible appetizer.
- Middle Eastern dishes: Delight in dipping it into rich, spiced stews or salads like tabbouleh.
Storage & Reheating Instructions
For any leftovers (though you likely won’t have many!), you can store them in an airtight container in the refrigerator for up to 3 days. If you want to preserve them longer, freeze bread pieces wrapped individually in plastic wrap or aluminum foil. When you’re ready to enjoy, reheat on the stovetop for a minute or two, or pop them in the microwave for 15-20 seconds. Trust me; they’ll taste just as delectable as when they first came off the skillet.
Estimated Nutrition Information
Approximately 120 calories per serving (one piece), with 3g protein, 20g carbohydrates, and 4g fat. Keep in mind that actual values may vary based on specific ingredients and personal adaptations to the recipe.
FAQs
1. Can I use whole wheat flour instead of all-purpose flour?
Absolutely! Whole wheat flour adds a nutty flavor and denser texture. You may need to adjust the liquid slightly, as whole wheat absorbs more moisture than all-purpose flour does.
2. How do I know when the bread is fully cooked?
Look for a golden-brown color on both sides and a firm touch. If you press lightly, it should spring back. If it leaves an indentation, cook for a minute longer.
3. Can I add ingredients like cheese or herbs to the dough?
Yes! This recipe adapts beautifully to personal tastes. Incorporating shredded cheese or fresh herbs can take your stovetop bread to a new delicious level. Simply fold them into the dough until evenly distributed.
4. Is it possible to make this bread gluten-free?
Indeed! By substituting the all-purpose flour with gluten-free flour blends, you can enjoy this recipe gluten-free. Just ensure your baking powder is also gluten-free.
5. How can I make this recipe vegan-friendly?
You can easily convert this recipe to a vegan version by replacing milk with plant-based milk and using coconut oil or a dairy-free butter alternative in place of melted butter.
As you can see, this No-Oven Stovetop Bread invites a realm of home-baked joy into your kitchen without the fuss of traditional baking. Once you experience the comfort and warmth it brings into your life, you may just find yourself making it time and time again. So gather your ingredients, take a moment to breathe in the aroma of the melting butter, and let the deliciousness unfold. Trust me; you’ll be glad you did!
Print
No-Oven Stovetop Bread
- Prep Time: 15 minutes
- Cook Time: 15 minutes
- Total Time: 30 minutes
- Yield: 8 servings 1x
- Category: Bread
- Method: Stovetop cooking
- Cuisine: International
- Diet: Vegetarian
Description
A quick and easy recipe for delicious stovetop bread that requires no oven, perfect for any occasion.
Ingredients
- 2 cups all-purpose flour
- 1 tablespoon baking powder
- 1 teaspoon salt
- 1 tablespoon sugar
- 3/4 cup milk
- 2 tablespoons melted butter
- Extra butter for cooking
Instructions
- Mix together the flour, baking powder, salt, and sugar in a large bowl.
- Pour in the milk and melted butter, stirring until a dough forms.
- Knead the dough on a floured surface for about 3–5 minutes until smooth.
- Divide the dough into small balls, about the size of a golf ball.
- Heat a non-stick skillet over medium heat and add a pat of butter.
- Flatten each ball slightly and place them in the skillet.
- Cook each side for about 4–5 minutes until golden brown.
- Serve warm with butter and honey.
Notes
Customize with herbs, spices, or cheese as desired.
Nutrition
- Serving Size: 1 piece
- Calories: 120
- Sugar: 4g
- Sodium: 400mg
- Fat: 4g
- Saturated Fat: 2g
- Unsaturated Fat: 2g
- Trans Fat: 0g
- Carbohydrates: 20g
- Fiber: 1g
- Protein: 3g
- Cholesterol: 10mg


