
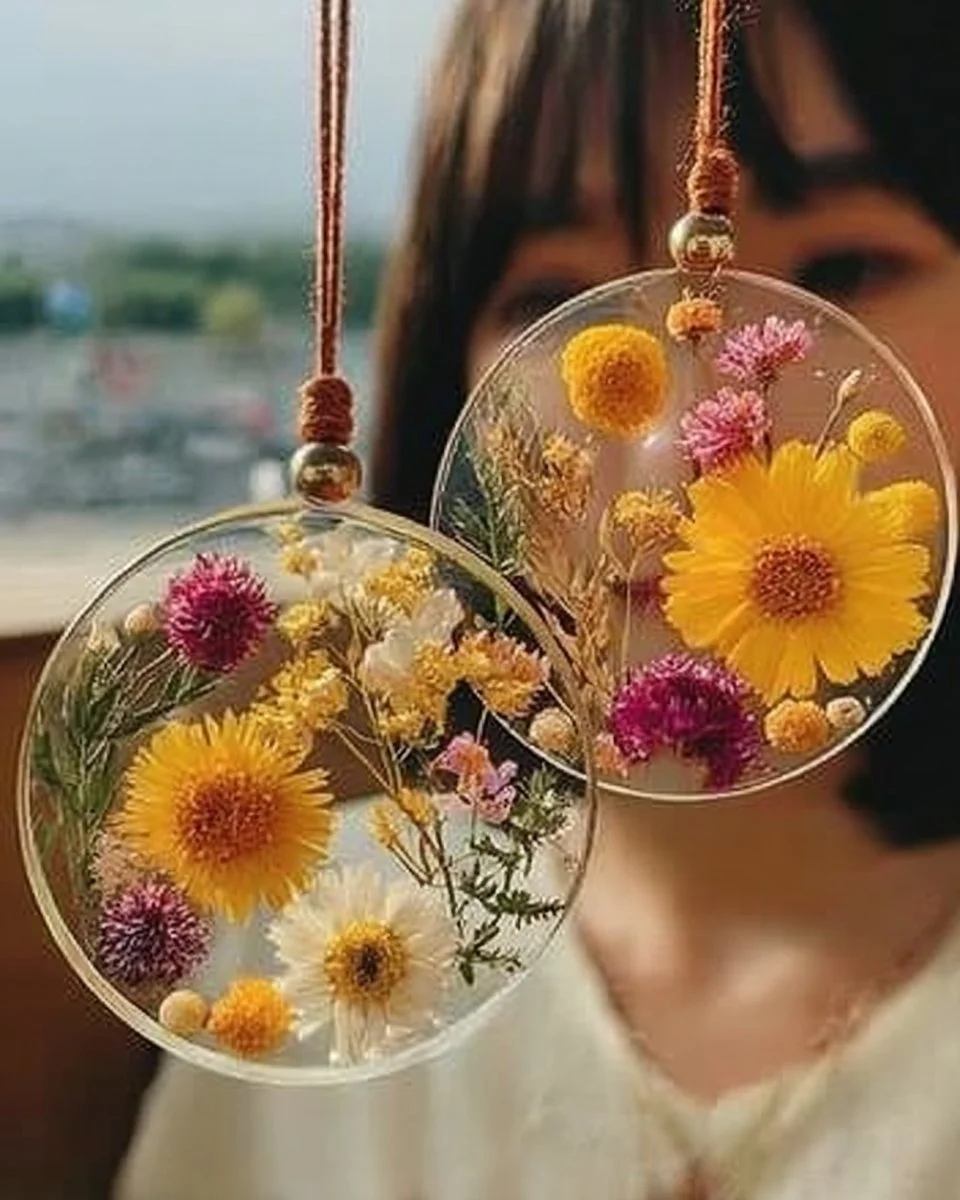
Capturing Nature’s Beauty: Transform Your Space with Pressed Flowers and Clear Glue
Imagine this: it’s a bright, sunlit afternoon, and you’ve gathered your closest friends for a delightful garden party. Laughter dances through the air, mingling with the soft tunes of a guitar strumming in the background. The sun filters through the leaves, casting dappled light on a beautifully laid table adorned with vibrant blooms and soft pastel hues. Yet, amidst all this beauty, there’s something special you’ve created that draws everyone’s attention – a stunning centerpiece made from pressed flowers encased in sparkling clear glue. It’s not just a decoration; it’s a conversation starter, a piece of art, a memory captured in time.
This enchanting DIY project has the power to transform any ordinary space into a serene sanctuary, celebrating the elegance of nature right in your home. So, gather your supplies, and let’s dive into this enchanting world where creativity meets the beauty of the great outdoors!

Why People Love This Idea
Pressed flowers have an undeniable charm – they hold all the colors and delicate details of the blooms we adore but in a timeless form. It’s like holding onto a sunny day in your palms! The beauty of using clear glue to create decorations is that it encapsulates the essence of those flowers while adding a glossy finish that captures the light beautifully. As the sun shines through these unique creations, they shimmer and glow, reflecting nature’s artistry in your living space.
Many find solace in crafting with natural elements. It’s not just about making something pretty; it’s about connecting with nature, engaging our senses, and expressing creativity. Moreover, this DIY project is an act of mindfulness, inviting you to slow down and appreciate the little things around you.
Benefits and Best Occasions to Use It
This practical yet artistic project offers various benefits. For starters, it allows you to recycle flowers from special occasions, like birthdays or anniversaries, preserving precious memories in a creative way. Additionally, these decorations make lovely gifts. Imagine presenting a close friend with a beautiful piece of art that showcases flowers from their garden — it’s personal, thoughtful, and unique.
Best of all, these creations perfectly suit any occasion. Birthdays, weddings, baby showers, or even a simple dinner gathering—pressed flower decorations can be tailored to fit any theme, season, or color palette.
Materials You’ll Need
Let’s gather our supplies. The simplicity of this project is part of its magic:
- Clear Glue: Opt for a high-quality clear-drying glue that works well for crafts. This will be your main ingredient, ensuring your flowers are beautifully preserved.
- Pressed Flowers: You can either purchase them from craft stores or create your own by drying flowers from your garden or a florist.
- Glass or Acrylic Frames/Jars: These will house your floral masterpieces. Think outside the box—antique frames, small jars, or coasters can all serve as unique canvases.
- Tweezers: Useful for positioning those delicate petals with precision.
- Sponge Brush or Paintbrush: Ideal for applying glue evenly across your surface.
- Scissors: For any trimming or adjustments you may need.
Gathering these materials transforms into an adventure of its own, as you explore the local craft store or gather blooms from your garden.
Step-by-Step Instructions
-
Prepare Your Workspace: Lay down some newspaper or a protective mat on your crafting surface. This will protect your area while you work your magic.
-
Select Your Flowers: Choose a variety of pressed flowers in your favorite colors. Mix shapes and sizes to create depth and visual interest.
-
Arrange the Flowers: Use tweezers to position the flowers on your chosen surface. Play around with different layouts until you feel satisfied with your arrangement. Allow your creativity to flow; there are no wrong choices here!
-
Apply Clear Glue: Using a sponge brush, gently apply a layer of clear glue over your arrangement. Ensure that every flower and petal is well-coated but be mindful not to flood the arrangement. The goal is to create a smooth, glossy finish without creating bubbles.
-
Let It Dry: This is the hardest part! Let your creation dry thoroughly. Depending on the thickness of glue, this could take a few hours to overnight.
-
Finish Up: If you’re using a frame, secure the backing once the glue is fully dry. For jars, you can leave them open or cover them with a lid for a more rustic look.
Helpful Tips
- Using Fresh Flowers: If you wish to use fresh flowers, press them ahead of time by placing them between the pages of a heavy book or using a flower press.
- Experiment with Colors: The beauty lies in mixing different flower types and colors. Don’t shy away from the unexpected!
- Layering: Consider layering flowers for a three-dimensional effect. Just ensure the top layer is safely secured to avoid shifting.
Common Mistakes to Avoid
While the process is straightforward, a few pitfalls can turn your dreamy project into a not-so-favorite craft:
- Too Much Glue: Overloading on glue can drown the delicate beauty of the flowers. Always start with a thin layer, adding more if needed.
- Not Allowing Enough Dry Time: Rushing the drying time can lead to smudged or uneven results. Patience will reward you with a stunning finish.
- Poor Quality Flowers: Investing in well-preserved flowers will make a night-and-day difference in the overall look of your finished piece.
Creative Variations
Feeling adventurous? Here are some creative twists to ignite your inspiration:
- Themed Creations: Tailor the colors and types of flowers to your current décor, season, or even personal interests—think autumn leaves or summer blooms.
- Mixed Media: Combine your pressed flowers with other materials like beads, glitter, or even printed photos for a more personalized touch.
- Fridge Magnets: Create smaller versions of these pressed flower beauties to use as magnets. Simply attach your flowers to a small piece of acrylic or glass with glue, cut them into fun shapes, and add a magnet to the back.
Presentation Ideas
When displaying your pressed flower decorations, think about how the light interacts with them. A sunlit windowsill can create stunning visual displays, especially when the sun filters through the flowers. Consider arranging multiple pieces together for a gallery effect on a wall or as a table centerpiece.
Maintenance Tips
To keep your pressed flower creations looking stunning:
- Avoid Direct Sunlight: This will help maintain colors and prevent fading over time.
- Dust Gently: Use a soft cloth to remove any dust build-up, ensuring you maintain the pristine quality of your artwork.
FAQs
-
How long do pressed flowers last?
- When properly pressed and displayed, they can last for many years. Just be sure to handle them with care!
-
Can I use artificial flowers?
- Absolutely! Artificial flowers can provide long-lasting beauty and can be treated similarly with clear glue.
-
Do I need to seal the flowers?
- If you want added protection, consider using a spray sealer specifically designed for crafts before applying glue.
Conclusion: Craft Your Own Path
Creating pressed flower decorations with clear glue isn’t just a lovely way to beautify your space; it’s a journey into creativity, tranquility, and nostalgia. Whether you’re embarking on this project solo with a cup of tea in hand or surrounded by friends sharing laughter and ideas, each step infuses a little more joy into your heart.
So, gather your flowers, unleash your creativity, and let the beauty of nature blossom in your home. Each pressed flower will not only be a stunning piece of decor but a reminder of cherished moments, seasons passed, and the bounty of your creativity. Now, go forth and craft your own little stories of nature, light, and love!


