
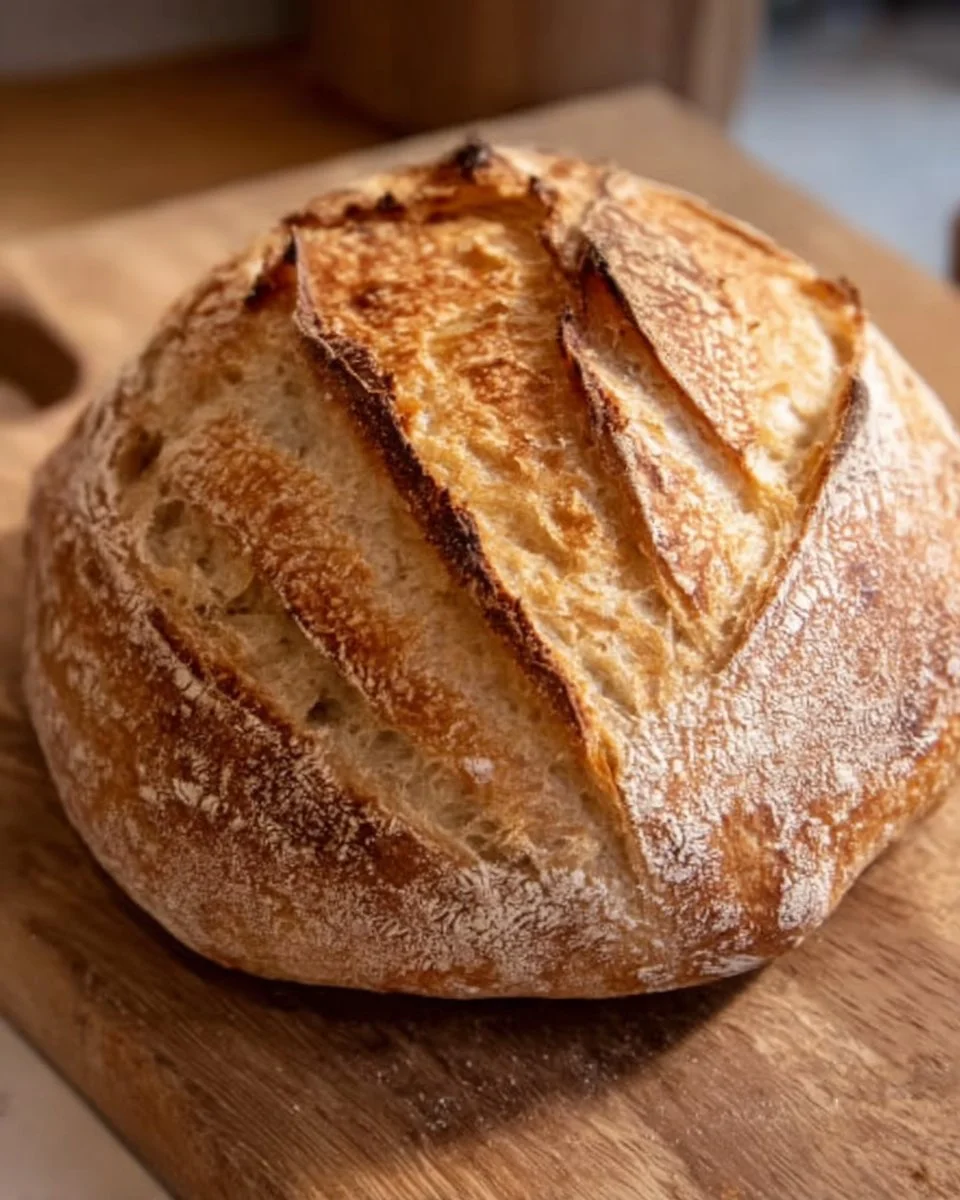
There’s a particular magic in the air when you decide to make a sourdough boule. As you start the process, the gentle whisper of flour meeting water creates an alluring mixture that beckons you to continue. The anticipation builds as your hands knead the dough, forming a silky, stretchy marvel that feels alive under your fingertips. The aroma dances through your home, teasing your senses – rich, earthy, and full of promise. And then, after hours of patiently waiting, your creation emerges from the oven, crowned with a crackling crust that shatters beautifully with the slightest touch, revealing a tender, airy crumb glistening with moisture that speaks of depth and flavor.
Imagine the first slice. The crust, golden and crisp, gives way to a chewy interior, each bite warm and slightly tangy from the sourdough fermentation. With the smell of freshly baked bread wrapping around you like a warm hug, it’s hard not to savor the moment. Whether you indulge in it with a smear of homemade butter or pair it with a simple bowl of soup, this sourdough boule transforms the mundane into the extraordinary, turning a quiet evening into a feast.
Why You’ll Love This Effortless Sourdough Boule
This sourdough boule is more than just a loaf of bread; it’s a celebration of simple ingredients and the satisfying art of bread-making. The robust flavor provides a stunning backdrop for a myriad of occasions, from cozy breakfasts to elegant dinner parties. Its versatility means it can stand alone as a delightful snack or serve as a sturdy companion to soups and cheeses. Each bite encapsulates warmth and comfort, making it perfect for shared moments with friends and family.
Not only does this recipe yield a show-stopping loaf, but the process also invites you into a world where time feels suspended. The gentle rise and fold build anticipation, creating a ritual of patience and care. Plus, with the help of your trusty sourdough starter, you engage in a bond with the bread that’s both ancient and timeless.
Preparation Phase & Tools to Use
To embark on this delicious journey, gather a few kitchen essentials that will make your bread-making experience effortless:
- Mixing Bowl: A large bowl to mix your ingredients comfortably; it should provide ample space for the dough to expand.
- Dough Scraper: This handy tool helps you manage the sticky dough and makes folding easy.
- Proofing Basket: Often called a banneton, this basket shapes your boule while it rises, ensuring a beautiful round form.
- Dutch Oven: The cornerstone of this recipe; it keeps humidity in the oven during baking, leading to a crust that’s perfect—crunchy on the outside and soft on the inside.
- Kitchen Towel: To cover your dough while it rises, maintaining warmth and moisture.
Before you begin, consider these practical tips:
- Familiarize yourself with your starter and ensure it’s active and bubbly.
- Measure ingredients precisely for the best results.
- Plan ahead; this recipe takes time but requires minimal hands-on effort.
Ingredients for Effortless Sourdough Boule
Gather the following ingredients, each playing a crucial role in developing flavors and textures:
- 500g bread flour: Provides the structure and chewiness characteristic of great bread.
- 350g water: Hydrates the flour, activating gluten and producing a tender crumb.
- 100g active sourdough starter: Introduces natural yeast and bacteria, lending that beloved tanginess.
- 10g salt: Enhances flavor and strengthens the dough.
Feel free to substitute some ingredients if needed. For instance, you could use all-purpose flour instead of bread flour, though the texture may vary slightly.
How to Make Effortless Sourdough Boule
-
Combine Flour and Water: In a large bowl, mix the flour and water using your hands or a spatula until it forms a shaggy dough. Let it rest for 30 minutes—this process, called autolyse, enhances the dough’s extensibility.
-
Incorporate Starter and Salt: Add the active sourdough starter and salt to the dough. Knead gently but thoroughly until fully combined. It’s okay if it feels sticky; that’s the beauty of sourdough!
-
Bulk Fermentation: Cover the bowl with a kitchen towel and let it rise at room temperature for 4-6 hours. During this time, fold the dough every hour to develop strength. Simply pull one side of the dough over to the opposite side and repeat—this builds structure while keeping it airy.
-
Shape the Boule: Once your dough has risen and feels puffed, turn it out onto a lightly floured surface. Shape it into a round loaf, tucking the edges under to create surface tension. Place it seam side up in a floured proofing basket.
-
Final Proofing: Let your bread proof for 1-2 hours. The dough should become springy and hold its shape.
-
Preheat and Bake: About 30 minutes before baking, preheat your oven to 450°F (232°C), placing your Dutch oven inside to heat up.
-
Transfer and Cover: Carefully remove the hot Dutch oven and place the dough inside, seam side down. Cover with the lid and bake for 30 minutes.
-
Uncover and Continue Baking: Remove the lid and bake for an additional 15-20 minutes until the crust turns golden brown and develops a beautiful shine.
-
Cool and Slice: Allow your bread to cool on a wire rack before slicing to ensure the crumb sets beautifully.
Chef’s Notes & Helpful Tips
-
Make-Ahead Considerations: If time runs short, the dough can be placed in the fridge during the bulk ferment stage. This slows down the fermentation process and develops a deeper flavor.
-
Alternative Cooking Methods: If you don’t have a Dutch oven, you can bake on a pizza stone or in a regular loaf pan. Just add a pan of water at the bottom of the oven to create steam.
-
Customization Ideas: Feeling adventurous? Add in herbs like rosemary or a handful of olives or nuts. Experimenting with different flours can also yield delightful results.
Common Mistakes to Avoid
-
Under/Over Fermenting the Dough: Keep an eye on your dough. It should feel puffy but not doubled in size. If it collapses when you shape it, it has over-proofed; if it’s too dense, it may need more time.
-
Skipping the Rest: Autolyse is vital. This step helps the dough to become more elastic. Don’t rush it!
-
Not Grooming the Crust: Be generous with flour in the proofing basket to avoid sticking; but remember, a well-floured surface contributes to the crust heating promptly when hitting the hot Dutch oven.
What to Serve With Effortless Sourdough Boule
The beauty of this sourdough boule is its versatility; it pairs splendidly with numerous accompaniments:
- Homemade Butter: A simple spread of room temperature butter elevates every slice, enhancing that lush feel.
- Savory Soups: Pair it with a creamy potato leek soup for a delightful combo of flavors and textures.
- Charcuterie Board: Slice it thin, and serve with aged cheese, artisanal meats, and olives for a cultured delight.
- Bruschetta: Top with fresh tomatoes, basil, and balsamic for a taste explosion.
- Egg Dishes: Serve alongside a fluffy omelet or runny poached eggs for a hearty breakfast.
- Salads: A side of crusty sourdough complements a fresh green salad doused in vinaigrette beautifully.
Storage & Reheating Instructions
Store your leftover sourdough boule in a paper bag at room temperature for up to 3 days to maintain optimal freshness. For longer storage, slice and freeze the loaf, preserving it for delightful toasts or sandwiches later. To reheat, pop slices directly in a toaster or the oven until warm, and enjoy.
Estimated Nutrition Information
Keep in mind that nutrition values can vary based on ingredient brands and measurements. An approximate serving contains:
- Calories: 160
- Carbohydrates: 34g
- Protein: 6g
- Fat: 1g
- Fiber: 1g
- Sodium: 220mg
This information should be treated as a guide.
FAQs
How long does it take to make sourdough boule?
The overall time from start to finish is about 8-10 hours, including fermentation and baking. Most of this time is hands-off, allowing you to engage in other activities!
What can I do if my sourdough starter isn’t bubbling?
Make sure to feed your starter regularly with equal parts flour and water. It should smell tangy and bubbly when ready; make adjustments to feeding times based on your kitchen temperature.
Can I make this bread gluten-free?
Absolutely! Substitute the bread flour with a gluten-free bread mix, but ensure a binding agent like xanthan gum is included for proper structure.
Why is my sourdough bread dense?
If your dough didn’t rise enough or if it over-proofed, the bread can turn out dense. Ensure you give the dough ample time to rise and carefully monitor during proofing.
How can I adjust the tanginess of my sourdough?
To control the tanginess, influence the fermentation time. For a milder tang, shorten the proofing time and refrigerate the dough if needed.
Embrace the joy of baking with this effortless sourdough boule, and let your kitchen resonate with the rich aromas of bread baking. Each loaf serves as a canvas for culinary creativity and shared moments. So, roll up those sleeves, mix that dough, and prepare for the delicious adventure of making your bread—a ritual that transforms mere ingredients into a vastly rich experience just waiting to be devoured.
Print
Effortless Sourdough Boule
- Prep Time: 30 minutes
- Cook Time: 45 minutes
- Total Time: 525 minutes
- Yield: 1 large loaf 1x
- Category: Bread
- Method: Baking
- Cuisine: Artisan
- Diet: Vegetarian
Description
A celebration of simple ingredients and the art of bread-making, this sourdough boule features a crackling crust and a chewy, tangy interior.
Ingredients
- 500g bread flour
- 350g water
- 100g active sourdough starter
- 10g salt
Instructions
- Combine flour and water in a large bowl, mixing until it forms a shaggy dough. Let rest for 30 minutes.
- Incorporate the active sourdough starter and salt into the dough and knead gently until fully combined.
- Cover the bowl with a kitchen towel and let it rise at room temperature for 4-6 hours, folding the dough every hour.
- Turn it out onto a lightly floured surface and shape into a round loaf, placing it seam side up in a floured proofing basket.
- Let proof for 1-2 hours until the dough is springy.
- Preheat the oven to 450°F (232°C) with the Dutch oven inside for 30 minutes.
- Transfer the dough carefully into the hot Dutch oven seam side down, cover and bake for 30 minutes.
- Remove the lid and continue baking for another 15-20 minutes until golden brown.
- Cool the bread on a wire rack before slicing.
Notes
Store leftover bread in a paper bag at room temperature for up to 3 days. For longer storage, slice and freeze.
Nutrition
- Serving Size: 1 slice
- Calories: 160
- Sugar: 0g
- Sodium: 220mg
- Fat: 1g
- Saturated Fat: 0g
- Unsaturated Fat: 0g
- Trans Fat: 0g
- Carbohydrates: 34g
- Fiber: 1g
- Protein: 6g
- Cholesterol: 0mg


