

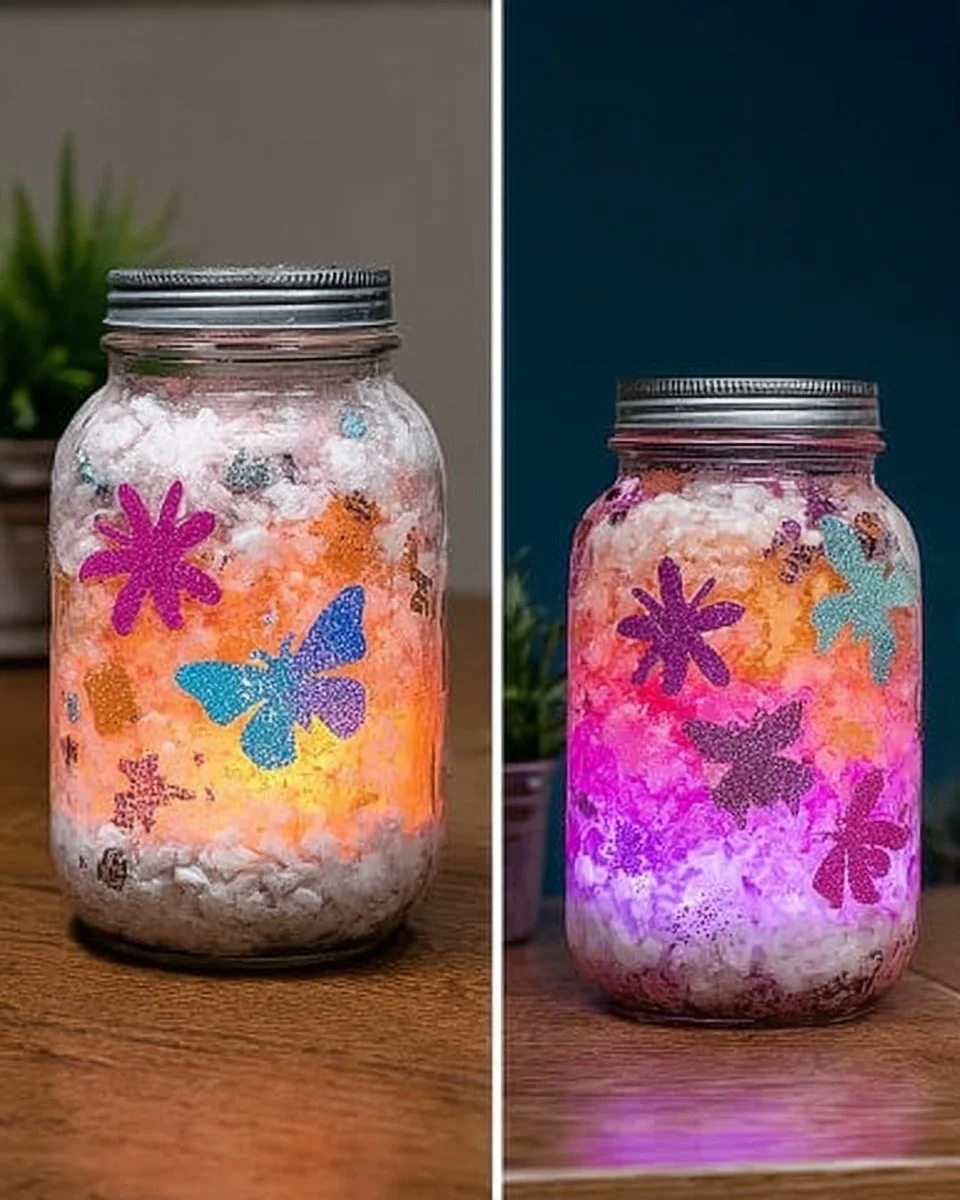
Ignite the Night: Crafting Glow Jar Night Lights
As the sun dips below the horizon, shades of orange and pink fade into the deepening blue of twilight. The scent of fresh grass mingles with the cool evening air, inviting families and friends to gather for magical moments under the stars. It’s during evenings like these, filled with laughter and storytelling, that we reminisce about the comforting glow of childhood nights; soothing lights that wrapped us in warmth, guiding us through the dark.
Imagine this: your little one is frightened by the whispers of night, the shadows echoing softly. You want to bring them comfort, a gentle light that dances as if alive, igniting their imagination—enter the Glow Jar Night Light! Not only a craft project but a beautiful companion for dreams, this simple yet enchanting creation brings both joy and serenity.
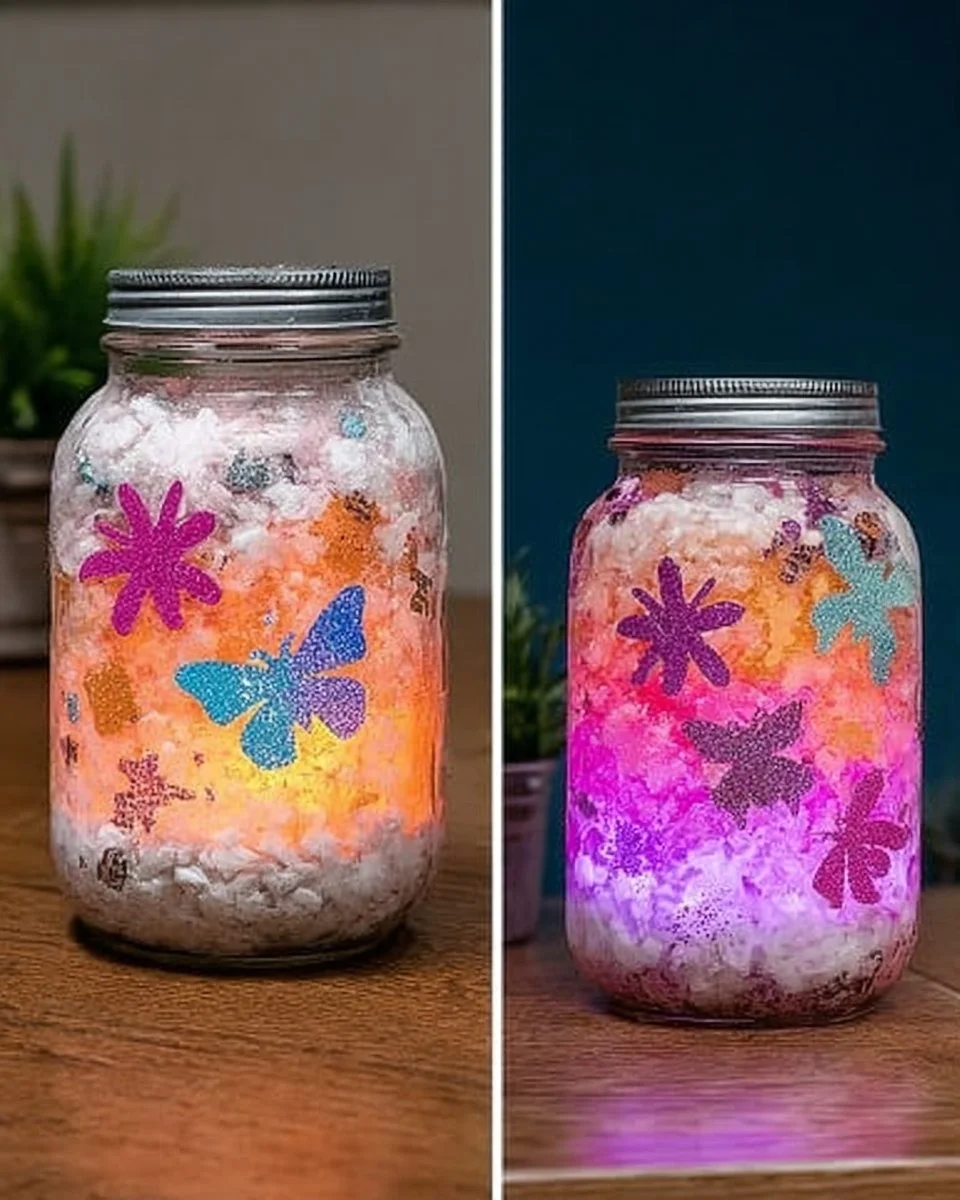
The Allure of the Glow Jar
Glow Jar Night Lights are more than just whimsical decorations. They become cherished items, transforming a mundane room into a fantastical realm each time they twinkle. Perhaps it’s the soft pastel lights that mimic the hues of the northern lights or the sparkling glitter that glimmers like stardust, but there’s something inherently magical about them.
Parents adore this project for the creative freedom it allows. Children revel in the hands-on experience, immersing themselves in a world of imagination as they watch the layers of cotton and light come together. Whether it’s spicing up a bedroom, adding charm to a party, or creating a dreamy atmosphere for movie nights, these jars brighten up any occasion.
Benefits & Perfect Occasions
Glow Jar Night Lights are perfect for various occasions! Here are just a few ways to delight in their glow:
- Sleepy Time Companion: They create a tranquil environment for little ones trying to drift off to sleep, offering comfort in the dark.
- Decor for Parties: Add a touch of charm to your gatherings. Glow Jars scattered around a table or hung can illuminate your space with a warm, inviting glow.
- Seasonal Decor: Year-round, they can be adapted to different themes—harvest vibes in autumn or a cool winter wonderland during the holidays.
- Gift of Light: Handmade gifts never go out of style. Whether for a birthday, holiday, or ‘just because,’ these enchanting jars bring love and warmth.
What You’ll Need
Before diving into this delightful project, here’s a handy checklist of materials to gather:
- Mason jar: Perfect for showcasing the vibrant glow and rich texture!
- Glow bracelets or glow sticks: These magical sources of light are the heart of this project.
- Cotton balls: Soft and fluffy, they act as the canvas for our glow.
- Fine glitter: Because a little sparkle adds a whole lot of charm.
- Decorative stickers or faux flowers: Personalizing your jar adds an extra layer of creativity.
- Butterfly stickers: Perfect for that nature-inspired touch, fluttering beauty!
- Scissors: To carefully prepare our glow source.
Crafting Your Glow Jar, Step by Step
Now comes the fun part! Creating your Glow Jar is a delightful journey that invites creativity and joy. Here’s how to do it, step by step.
Step 1: Fill the Jar
Begin by placing cotton balls inside the mason jar until it’s nearly full. As you work, allow yourself to appreciate the softness and fluffiness of the cotton—this is the foundation of your glow.
Step 2: Sprinkle Some Magic
Once your jar is filled, let your imagination take flight as you sprinkle fine glitter over the cotton balls. Visualize how this will catch the light, transforming your jar into a shimmering wonder.
Step 3: Activate the Glow
Now it’s time for the glow! Carefully bend and shake the glow bracelets to activate them—feel the anticipation as the light begins to glow!
Step 4: Pour the Glow
With your scissors, cut open the glow bracelets over the cotton balls. Watch as the glowing liquid spills out, soaking into the soft cotton. This is where the magic truly begins, bringing your project to life.
Step 5: Mix and Glow
Seal the jar tightly with the lid and give it a gentle shake to spread the glow evenly among the cotton. The combination of the cotton, glitter, and glowing liquid creates a stunning light show, inviting potential dreams.
Step 6: Personalize
Finally, let your creativity shine! Decorate the outside of the jar with your decorative stickers and faux flowers. Perhaps you’ll place a butterfly sticker as if they’re dancing around the light, or create a garden scene that illuminates through the jars.
Tips for a Successful Glow Jar
Adding a few tips can elevate your Glow Jar crafting experience:
- Mix Glow Colors: For a magical rainbow effect, use different colored glow sticks.
- Glitter Galore: If you love sparkle, don’t hold back! Add as much glitter as your heart desires.
- Perfect Display: For the ultimate glow effect, showcase your jar in a dark room—it amplifies the radiant light and charm you’ve created.
Beginner Mistakes to Avoid
New to crafting? Fear not! Here are common pitfalls to steer clear from:
- Overfilling the Jar: Remember, the cotton should be the main show; don’t overcrowd with materials or liquid.
- Skipping the Shake: After sealing, shaking the jar ensures even distribution of glow. Give it a good gentle tumble to maximize the effect.
- Cheap Materials: Opt for quality glow sticks and glitters—they’ll enhance the vibrancy and longevity of your Night Light.
Creative Variations to Explore
Feel inspired to venture beyond your initial creation? Here are a few creative variations:
- Seasonal Themes: Use Halloween stickers and orange or purple glow sticks for a spooky jar, or pastel shades and floral designs for springtime.
- Layered Glow: Add layers of cotton, glitter, and glow liquid to create depth and intrigue within the jar.
- Sound and Light: Pair the jars with cheerful musical tunes—throughout parties or bedtime routines, it adds an extra dash of magic.
Displaying Your Glow Jar
Once your masterpiece is complete, where should it go? Consider displaying it on a nightstand or using it as a centerpiece at a party. You could even hang them with twine as beautiful decoration. The glow combined with the creativity is bound to capture everyone’s heart.
Frequently Asked Questions
How long does the glow last?
The duration of the glow depends on the quality of your glow sticks; typically, they should last from a few hours to up to 12 hours.
Can I reuse the jar?
Yes! Once you’re finished, you can clean the jar out. With some care, you can freshen it up and make a new glow jar, bringing back the magic again.
Embrace the Glow
As the night wraps its comforting arms around your home, the Glow Jar Night Light stands as a beacon of warmth and enchantment, whispering promises of dreams and adventures to come. This simple craft empowers not only a hands-on experience but infuses any space with captivating light.
So gather your materials, prepare for a fun-filled afternoon, and let your creativity blossom. This isn’t just a craft—it’s an opportunity to create something beautiful, something that will evoke laughter and love in your home each evening.
Through the simple creation of a Glow Jar, you bring not only light but warmth, comfort, and a sparkle of magic into your life. As you dream beneath the glow of your very own creation, may it remind you of the joy found in crafting memories, one flicker at a time.
SEO Meta Description:
Create beautiful Glow Jar Night Lights with this step-by-step guide, perfect for soothing little ones to sleep or adding charm to any occasion. Join us as we explore this magical DIY project!
SEO Tags:
Glow Jar Night Lights, DIY Crafts, Family Activities, Kid Friendly Projects, Night Light Ideas, Home Decor, Creative Crafting






