
Before You Throw Away Old CDs! Make Dazzling Rainbow Wind Spinners That Fill Your Yard with Light
As the sun filters through the trees, casting playful shadows across the yard, it becomes a sanctuary of memories—where laughter and light dance together. Here, on a lazy Sunday afternoon, I found myself surrounded by a pile of old CDs, their once-vibrant surfaces faded and clouded with time. It hit me: why not breathe new life into these forgotten treasures? Today, I’m excited to share how to transform these relics into stunning rainbow wind spinners that twirl and shimmer in the sunlight, filling your outdoor space with a magical glow.

Rediscovering Forgotten Treasures
Just about every household has a collection of these once-beloved discs, relics from days of burning mixtapes and albums that have long since migrated to digital platforms. Instead of tossing them into the recycling bin or shoving them deep into a drawer, let’s rethink their future. There’s something incredibly fulfilling about turning something seemingly obsolete into a piece of joy that fills your yard with wonder.
Why do we love this project? Because it taps into our nostalgia while allowing us to unleash our creativity. As the wind catches our creations, we’re not just crafting an object; we’re weaving new memories into old ones, sparking beauty and happiness with every gust.
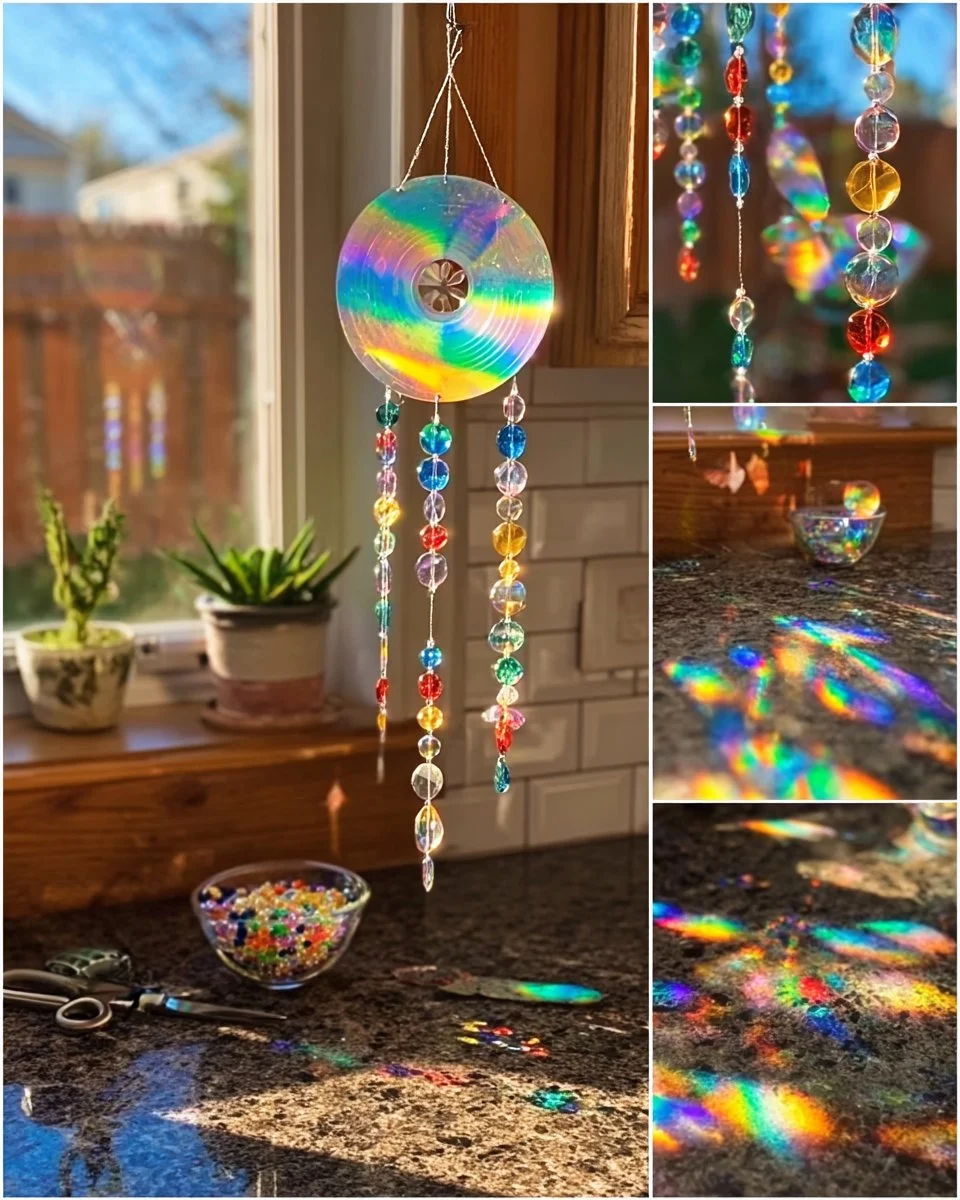
Sparkle and Shine: The Beauty of Wind Spinners
Dazzling rainbow wind spinners do more than just catch the eye—they fill any outdoor space with life. Picture them glittering in the sunlight, their colors reflecting off one another, resulting in a kaleidoscope of hues that transform even the plainest porch or backyard into a lively canvas. Whether you’re decorating for a festive gathering or simply enjoying a tranquil afternoon in nature, these wind spinners become an extension of your personal expression.
Why Crafting Wind Spinners?
- Joyful Decoration: They add a whimsical, colorful touch to your garden.
- Easy to Create: This project suits all ages and skill levels.
- Eco-Friendly Fun: Upcycling is always in style, and you’re doing your part to reduce waste.
- Memorable Gift: Homemade creations are cherished gifts for family and friends.
Gather Your Materials
Before we dive into the vibrant world of wind spinners, let’s gather our materials. This project is not only simple but also requires just a handful of items that you might already have around the house.
- Old CDs: Perhaps sitting in a dark corner, waiting to be transformed.
- Fishing line: Strong yet invisible—perfect for suspending your creations.
- Scissors: For all your cutting needs.
- Hole punch: To make assembly a breeze.
- Colorful beads: These will help separate your pieces and add extra sparkle.
Crafting Your Dazzling Wind Spinners
Now, let’s get crafting! I promise this process is relaxing and rewarding—perfect for a cozy family afternoon or even a solo adventure into creativity.
-
Cut the CDs: Start by snipping your old CDs into an assortment of diamond and teardrop shapes. The more varied your shapes, the more dynamic your spinner will be. Let your imagination run wild—each cut reflects your personal style.
-
Punch Holes: Using your hole punch, make a small hole near the top of each piece. This is where the fishing line will thread through, so be sure to place it strategically to allow for the maximum twirl!
-
Thread the Fishing Line: Take your fishing line and thread it through the holes you’ve created. Make sure to leave enough length for hanging. This is where your wind spinner will begin to take shape, and you may even enjoy a moment of peace as you watch the light bounce off the shiny surfaces.
-
Add Your Beads: Between the pieces, slip in some colorful beads. These add a pop of color and a playful element, enhancing the overall design. Plus, they help to create spaces that allow your spinner to catch the wind and move beautifully.
-
Tie It All Together: Once you’ve arranged your pieces to your liking, tie several strands of fishing line to a sturdy ring—this will be the base from which your wind spinner hangs. It should feel secure yet lightweight enough to catch the wind effortlessly.
-
Hang Your Spinner: Find a sunny spot outdoors where your spinner can bask in the light. Whether dangling from a tree branch or suspended from your porch, watch as the wind breathes life into your creation, making it spin and shimmer like magic.
Tips for a Successful Crafting Experience
Crafting is as much about the journey as it is about the end result, so embrace the process! Here are a few tips to make your wind spinner experience even better:
- Choose Colorful CDs: If you happen to have a variety of CDs, select those with interesting colors or designs for extra flair.
- Experiment with Shapes: Don’t hesitate to try various shapes beyond diamonds and teardrops. Experimentation can lead to stunning results!
- Adjust for Size: If you want a larger wind spinner, gather more CDs or use bigger pieces—just keep the balance in mind for a beautiful spin.
- Use Clear Fishing Line: This gives the illusion that your wind spinner is floating, making it even more enchanting against the backdrop of your garden.
Common Mistakes to Avoid
Even the best of us can trip up during crafting adventures. Here are a few pitfalls to watch out for:
- Too Heavy: If you use too many CDs or beads, your spinner might become too heavy to twirl. Find a balance that keeps it light.
- Uneven Holes: Be mindful of the arrangement of your holes. If they’re uneven, your pieces may hang awkwardly or not spin as freely.
- Forget the Sun: Ensure you hang your spinner in a spot where it will receive direct sunlight to maximize its sparkling potential.
Creative Variations to Consider
Feeling bold? Here are some variations to inspire your next crafting session:
- Paint the CDs: Before cutting, consider painting or wrapping the CDs with colorful paper to give them a fresh look.
- Add String Lights: For evening enchantment, incorporate battery-operated string lights into your design, illuminating your spinner at dusk.
- Nature-Inspired Designs: Incorporate dried flowers or leaves to your spinners to create a natural vibe alongside your shiny pieces.
Maintenance Tips
Once your dazzling wind spinner is hanging proudly in your yard, you’ll want to give it some love to ensure longevity. Give it a gentle wipe with a soft cloth if it collects dust, and check periodically that the fishing line hasn’t frayed, particularly after windy days.
Frequently Asked Questions
Can I make wind spinners with different materials?
Absolutely! You can experiment with plastic, paper, or even lightweight metal. As long as it can spin and reflect light, the sky’s the limit.
Are these wind spinners weather-resistant?
As long as you use materials that are appropriate for outdoor conditions, your wind spinners should hold up well. Keep an eye on them during storms or heavy rain!
A Spirited Conclusion
Reflecting on that lazy Sunday afternoon, I can’t help but smile at the vibrant new life my old CDs have taken on. Each rainbow wind spinner twirls in a joyful dance, a radiant reminder that every piece has a story waiting to be told. From transforming forgotten treasures to brightening up our outdoor spaces, this project encapsulates the beauty of creativity and sustainability.
As you venture into your own crafting journey, remember: it’s not just about what you create, but also the joy and nostalgia you weave into every moment spent just being you. So gather your materials, pour yourself a refreshing drink, and let the winds of your imagination carry you away!
✨ S.H.A.R.E this sunshine craft with friends and family—because old CDs have never looked this magical!
Meta Description
Transform old CDs into dazzling rainbow wind spinners that brighten your yard and evoke nostalgia. This eco-friendly craft is easy, fun, and perfect for all ages!
Suggested SEO Tags
- Rainbow Wind Spinners
- Upcycle Old CDs
- DIY Outdoor Decor
- Crafting with Kids
- Sustainable Crafts
- Garden Decorations
- Creative Projects for Home


