

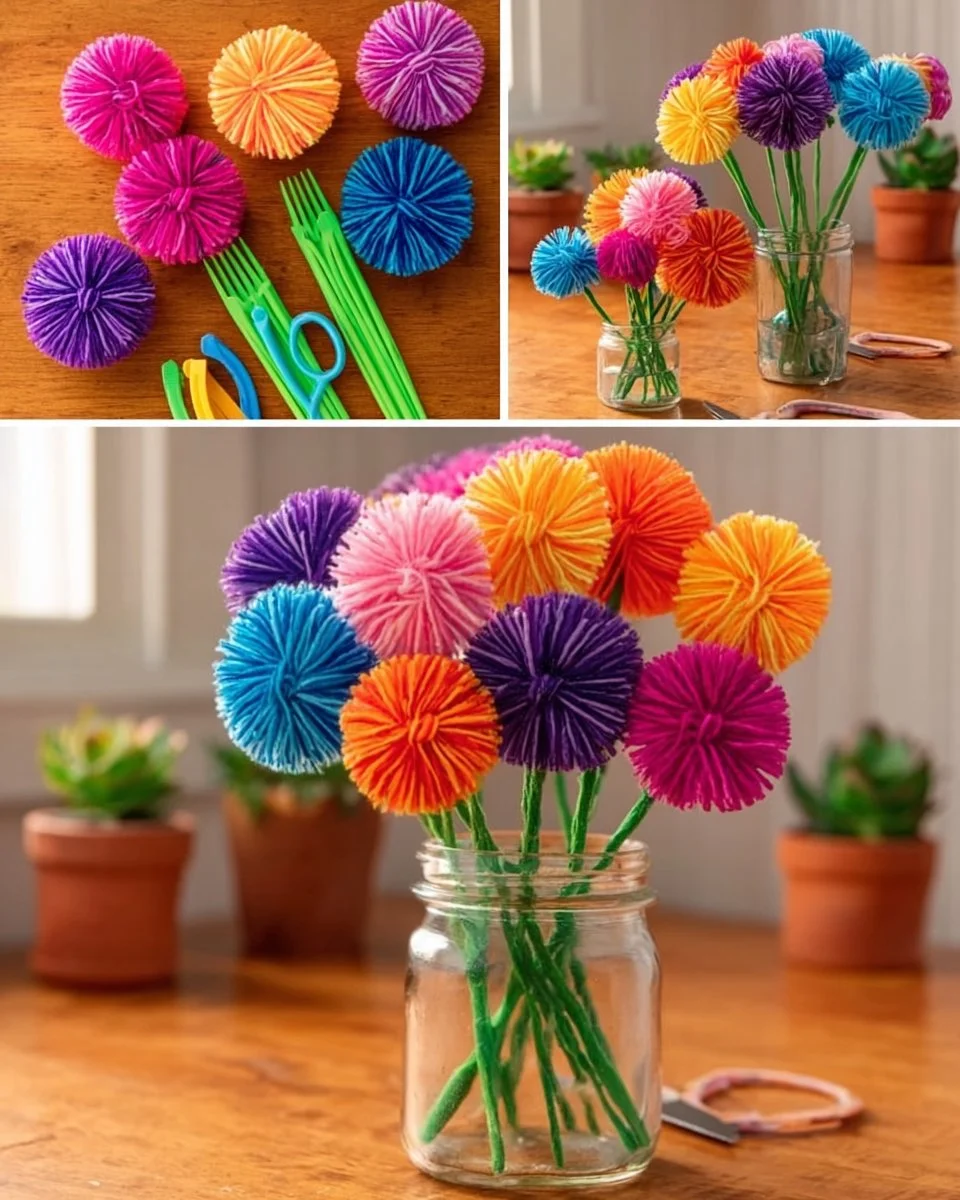
Bringing Sunshine Indoors: Crafting Rainbow Yarn Flowers
Imagine a cozy afternoon spent curled up on a sofa, the sunlight filtering through your windows, casting warm, golden rays across the room. You’re surrounded by the gentle hum of cheerful music, and the aroma of freshly brewed tea wafts through the air. This is the perfect backdrop for a delightful crafting adventure, right? Today, we’re inviting color and creativity into your home by making Rainbow Yarn Flowers, a simple yet enchanting project that can brighten any corner, celebrate special occasions, or just bring a smile to your face.
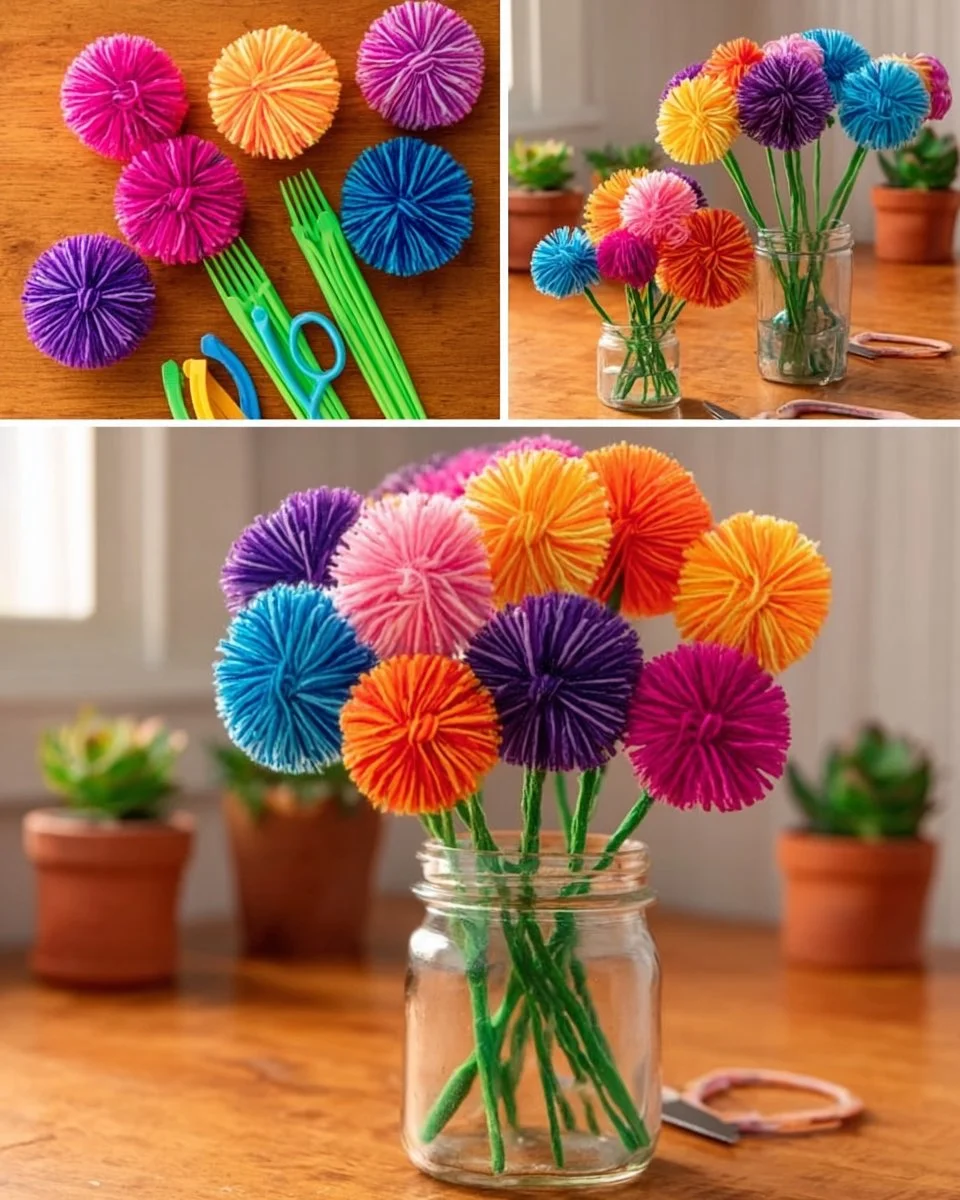
Why People Love This Craft
There’s something truly magical about creating something beautiful with your own hands, especially when it involves bright colors and fluffy textures. These Rainbow Yarn Flowers are not just delightful decor but also an excellent way to express yourself. They’ve charmed families and children alike, offering a creative outlet that hones fine motor skills while encouraging artistic exploration. Whether you’re a crafting novice or a seasoned DIY enthusiast, the process is engaging, inclusive, and oh-so-rewarding.
Here’s the beauty of these yarn flowers: they can be tailored to suit any occasion, from birthdays and graduations to intimate home decor. They serve as stunning centerpieces for festive gatherings, cheerful gifts for friends, and enduring reminders of the joy found in the simplest of things.
The Benefits of Crafting Rainbow Yarn Flowers
Creating these vibrant blooms goes beyond aesthetics. Engaging with your hands and fabric can be a therapeutic experience, allowing your mind to unwind and your creativity to flourish. Furthermore, as you work, you’ll find satisfaction in producing something unique—each flower a testament to your personal touch. There’s also the added benefit of sharing precious time with loved ones, whether it’s a weekend project with your kids or a cozy afternoon with friends.
Materials You’ll Need
Before we dive into the fun part, let’s gather our materials. You likely have some of these handy, and if not, they’re easily obtainable from local craft stores or online:
- Colorful Yarn: The star of the show! Opt for bright, multicolored yarn to create a vibrant rainbow effect.
- Plastic Forks: These will help us shape our flowers into luscious blooms.
- Green Craft Sticks: These will serve as sturdy stems.
- School Glue: A versatile adhesive for securing all parts together.
- Scissors: To snip, trim, and shape your flowers to perfection.
- Small Ball of Yarn for Flower Centers: This can be a different color to enhance the contrast and beauty of your flowers.
- Vase or Jar: The finishing touch to showcase your beautiful creations.
Step-by-Step Instructions
Let’s roll up our sleeves and dive into this colorful crafting adventure! Here’s how to create your own whimsical Rainbow Yarn Flowers:
Step 1: Start by wrapping your colorful yarn tightly around the fork. The more yarn you wrap, the fuller your flowers will look, so don’t hold back! Aim for at least 50-70 wraps, ensuring it appears thick and luscious.
Step 2: Once you’re satisfied with the fullness, take a small piece of yarn and tie it tightly around the center of your wrapped yarn. This tie will hold your flower together, so make sure it’s snug but not too tight that it squishes the yarn.
Step 3: Carefully slide your yarn bundle off the fork. Be gentle—this is where your beautiful flower starts to take shape!
Step 4: Using your scissors, cut through the loops on both sides of the bundle. As you snip, you’ll reveal the fluffy petals of your flower.
Step 5: Take a moment to fluff and trim the petals into a round shape. You want your flower to have a lovely fullness, so feel free to play with the length and shape here.
Step 6: To finish your masterpiece, glue a small rolled yarn circle in the center of your flower for a charming detail. Attach the flower to a green craft stick to create a stem, and voila—you have your very own Rainbow Yarn Flower!
Helpful Tips for Crafting Success
-
Color Play: Experiment with various hues to achieve a stunning rainbow effect. You might even let each family member choose their favorite color to foster a sense of personalization in your flower bouquet.
-
Petal Power: Trim your petals evenly for a well-proportioned flower; this will ensure your blooms look uniform and full, adding to the overall aesthetic.
-
Size Matters: Vary the sizes of your flowers for a dynamic arrangement. This mix creates visual interest and makes your bouquet even more enchanting.
Beginner Mistakes to Avoid
Even the simplest crafts can have their pitfalls. Here are a few mistakes to steer clear of:
-
Too Loose: If your yarn is wrapped too loosely around the fork, your flower might fall apart. Aim for a solid wrap!
-
Uneven Cuts: Not trimming your petals evenly may result in an awkward-looking flower. Take your time and adjust as needed.
-
Rushed Glue Work: Allow sufficient drying time for the glue; rushing this can cause parts to detach.
Creative Variations
Once you’ve mastered the basic flower shape, why not mix things up? You can create flowers with different sizes and petal shapes, perhaps experimenting with various yarn textures—think soft, fluffy yarns versus sturdier strands for a different visual appeal.
Add embellishments like beads or sequins to the centers for a bit of sparkle. Or, you might consider making a bouquet featuring different types of flowers; maybe some pom-pom flowers to accompany your yarn blooms!
Presentation Ideas
These Rainbow Yarn Flowers deserve a showcase! Display them in a vibrant vase or an upcycled jar adorned with a pretty ribbon or twine. Set them as a centerpiece during family gatherings, or give them as heartfelt gifts along with a handwritten note. The vibrant colors and playful texture add a whimsical touch to any space.
Storage and Maintenance Tips
Though these flowers are meant to be cheerful springtime decorations, you can store them safely to keep their beauty intact. Place them in a cool, dry space away from direct sunlight to prevent fading. Maintain their shape by keeping them upright in a box or a beautiful container.
Frequently Asked Questions
Q: How long do these flowers last?
A: The yarn flowers can last indefinitely with proper care, though they may accumulate dust over time.
Q: Can I use other materials?
A: Absolutely! Feel free to use fabric scraps or other embellishments to customize your flowers.
Q: What if I want to create larger flowers?
A: Simply use a larger fork for wrapping or increase the number of yarn strands you use to achieve your desired size.
A Final Touch
Crafting Rainbow Yarn Flowers is more than just a simple DIY project; it’s a celebration of creativity, color, and the simple joys of life. As your flowers come to life with just a few supplies and a bit of love, you’re not merely crafting decor—you’re weaving memories, brightening your spaces, and perhaps even sparking joy in those around you. The next time you find yourself with a free afternoon, gather your materials, unleash your imagination, and let the colors of the rainbow fill your home and heart. Happy crafting!
Meta Description:
Explore the joy of crafting Rainbow Yarn Flowers! Learn how to create vibrant, fluffy blooms that brighten any space with this engaging and detailed DIY guide.
Suggested SEO Tags:
- Yarn Flowers
- DIY Crafts
- Creative Home Decor
- Handmade Gifts
- Colorful Yarn Projects
- Family Craft Ideas
- Flower Arranging Techniques






