
Imagine standing under a blanket of twinkling stars, the crackling campfire casting dancing shadows on the cool evening air. As the captivating aroma of melting chocolate and sweet, toasted marshmallow wafts around you, an irresistible warmth envelops your senses. Each glimmering campfire cone awaits your eager hands, brimming with gooey goodness and the rich, nutty flavor of creamy Reese’s Peanut Butter Cups. A bite bursts forth with a mix of textures; the comforting crunch of the waffle cone harmonizes with the tantalizing softness of the marshmallows and the silkiness of chocolate that has melted into a divine mixture. This delightful treat is nothing short of a warm hug on a cool night, enticing your taste buds like nothing else.
Becoming the star of the evening, these Reese’s Campfire Cones are perfect for gatherings, family camping trips, or simply a cozy night in your backyard. Their playful presentation and easy preparation make them a fabulous choice for dessert enthusiasts of all ages. Each cone becomes a personal treasure trove of flavor, bursting with creative possibilities, ensuring everyone leaves the fire with a satisfied smile and sticky fingers. The joy of unwrapping each cone is a sweet ritual that heightens anticipation, transforming simple ingredients into an unforgettable experience.
Why You’ll Love This Recipe
First, these campfire cones tantalize the palate with a sweet-savory symphony. The combination of crunchy, caramelized waffle cones, pillowy marshmallows, and the iconic taste of Reese’s Peanut Butter Cups creates a flavor explosion that dances on your tongue. As the chocolate chips melt, they add an extra layer of richness, and every bite is a balance of sweet and salty bliss.
Perfect for summer evenings, camping adventures, or backyard bonfire nights, these cones are the star treat everyone will rave about. They encourage love and laughter, uniting generations around the campfire. Easy to customize, you can swap ingredients to suit your preferences, ensuring that no two campsites serve the same delightful creation. These cones stand out as not just a dessert but as a memorable part of your evening, securely capturing the spirit of fun and togetherness.
Preparation Phase & Tools to Use
Before diving into the creamy, chocolatey goodness of these cones, prepare your tools to ensure a smooth and successful cooking experience.
- Campfire or Grill: The heart of your cooking experience. You can also use an oven for indoor fun!
- Aluminum Foil: This acts as a protective layer, ensuring your cones cook evenly without burning.
- Tongs: Essential for safely flipping and removing hot cones from the fire.
Practical Preparation Tips
- Gather all your ingredients and tools beforehand. This saves time and helps keep the evening’s energy light and enjoyable.
- If using a campfire, ensure you have enough wood or charcoal ready to maintain a consistent medium heat for even cooking.
- Always keep a close eye on the cones while they roast to prevent overcooking—burnt marshmallows are not part of this delicious equation!
Ingredients for Reese’s Campfire Cones
- Waffle Cones: The crunchy vessel for your sweet treats. You can substitute with sugar cones for a similar taste.
- Mini Marshmallows: Soft, puffy delights that melt perfectly over the campfire. Use regular marshmallows if you prefer.
- Reese’s Peanut Butter Cups (chopped): These iconic morsels bring creamy, peanut buttery richness. You can swap them for chocolate-covered caramel candies if you want a twist.
- Chocolate Chips: They enrich the flavor and melt beautifully; semi-sweet works best, though you could use milk chocolate or dark chocolate for a different experience.
- Aluminum Foil: A must-have for protecting your cones as they roast.
How to Make Reese’s Campfire Cones
-
Preheat your campfire or grill to medium heat, ensuring an even and consistent cooking temperature. This builds the perfect environment for melty deliciousness.
-
Fill each waffle cone with a handful of mini marshmallows, followed by generous chunks of chopped Reese’s Peanut Butter Cups. Top it off with a sprinkle of chocolate chips for that extra indulgence.
-
Wrap the filled cones tightly in aluminum foil. Tightly sealing in the ingredients preserves the warmth and meltiness, ensuring every bite oozes with flavor.
-
Place the cones over the campfire or grill and cook for about 5–7 minutes, turning occasionally to achieve an even melt. Keep a watchful eye; this step is crucial to ensure everything cooks just right.
-
Carefully unwrap the cones and dig in! The warm, gooey concoction awaits within, promising each bite to be a moment of sheer bliss.
Chef’s Notes & Helpful Tips
- Make-ahead tips: You can prep the cones ahead of time by filling them and wrapping them in foil, keeping them chilled until you’re ready to heat them up.
- Cooking alternatives: Enjoy these delightful cones indoors by placing them in a preheated oven at 350°F for about 10 minutes, or try an air fryer for that perfectly crispy cone!
- Customization ideas: Add some sliced strawberries or bananas for a fruity twist, or mix in some nuts for a satisfying crunch. Let your creativity shine!
Common Mistakes to Avoid
While making these cones is straightforward, avoiding a few common pitfalls will heighten your experience:
-
Overfilling the cones: Resist the urge to pack them too tightly. Too many ingredients can make it difficult for the cone to heat evenly and may lead to spillage.
-
Neglecting to rotate the cones: This leads to burnt marshmallows on one side and cold ingredients on the other. Regularly turning ensures they melt beautifully.
-
Cooking on too high heat: Too much heat can cause the cones to burn before the insides melt. Stick to a moderate temperature for the best results.
What to Serve With Reese’s Campfire Cones
While these cones shine brightly on their own, consider pairing them with:
- Hot Cocoa: A rich and creamy drink enhances the sweetness.
- Grilled Fruit Skewers: A healthy balance to all the indulgence.
- Peanut Butter Cookies: For a double dose of peanuty goodness.
- Fresh Fruit Salad: Lightens up the sweet flavors with refreshing bites.
- Chocolate Chip Ice Cream: A scoop on the side promises a cooling contrast to the warm cones.
- S’mores: An all-time campfire classic that complements the experience.
Storage & Reheating Instructions
These cones are best enjoyed fresh, but if you must store them, keep them wrapped in the refrigerator for up to 2 days. Reheat carefully—pop them back in the grill or oven at a low temperature to revitalize their ooey-gooey goodness without burning.
Estimated Nutrition Information
An approximate breakdown for one Reese’s Campfire Cone (including waffle cone, mini marshmallows, peanut butter cups, and chocolate chips) includes:
- Calories: 250
- Total Fat: 12g
- Carbohydrates: 36g
- Protein: 4g
Note: Nutrition values can vary based on specific ingredients used.
FAQs
Can I use larger marshmallows instead of mini ones?
Yes, you can! Just be sure to cut them in half to ensure they melt evenly within the confines of the cone.
What if there’s no campfire or grill available?
You can absolutely make these cones in the oven or an air fryer, using the same filling instructions!
How do I keep the cones from getting soggy?
Make sure to eat the cones right after heating them. If you prepare them in advance, store them in a cool place, wrapped in foil.
Can I use other candies besides Reese’s?
Absolutely! Feel free to load your cones with chocolates, caramel, nuts, or even fruit. This recipe invites creativity!
How many cones can I make at once?
The number depends on the size of your grill or campfire setup, but if you have enough space, make as many as you like! Sharing is part of the fun!
Conclusion
The captivating allure of Reese’s Campfire Cones will forever change your nights under the stars. Each bite holds the power to weave delightful memories with family and friends, engaging all your senses in a truly delicious way. The simple yet delicious ingredients combine to create a heartwarming experience that brings a smile to faces both young and old. So gather your friends, ignite a fire, and indulge in a treat that promises joy, laughter, and perfectly melted goodness. Get ready to make this unforgettable dessert a staple of your summer adventures!
Print
Reese’s Campfire Cones
- Prep Time: 10 minutes
- Cook Time: 7 minutes
- Total Time: 17 minutes
- Yield: 4 servings 1x
- Category: Dessert
- Method: Grilling
- Cuisine: American
- Diet: Vegetarian
Description
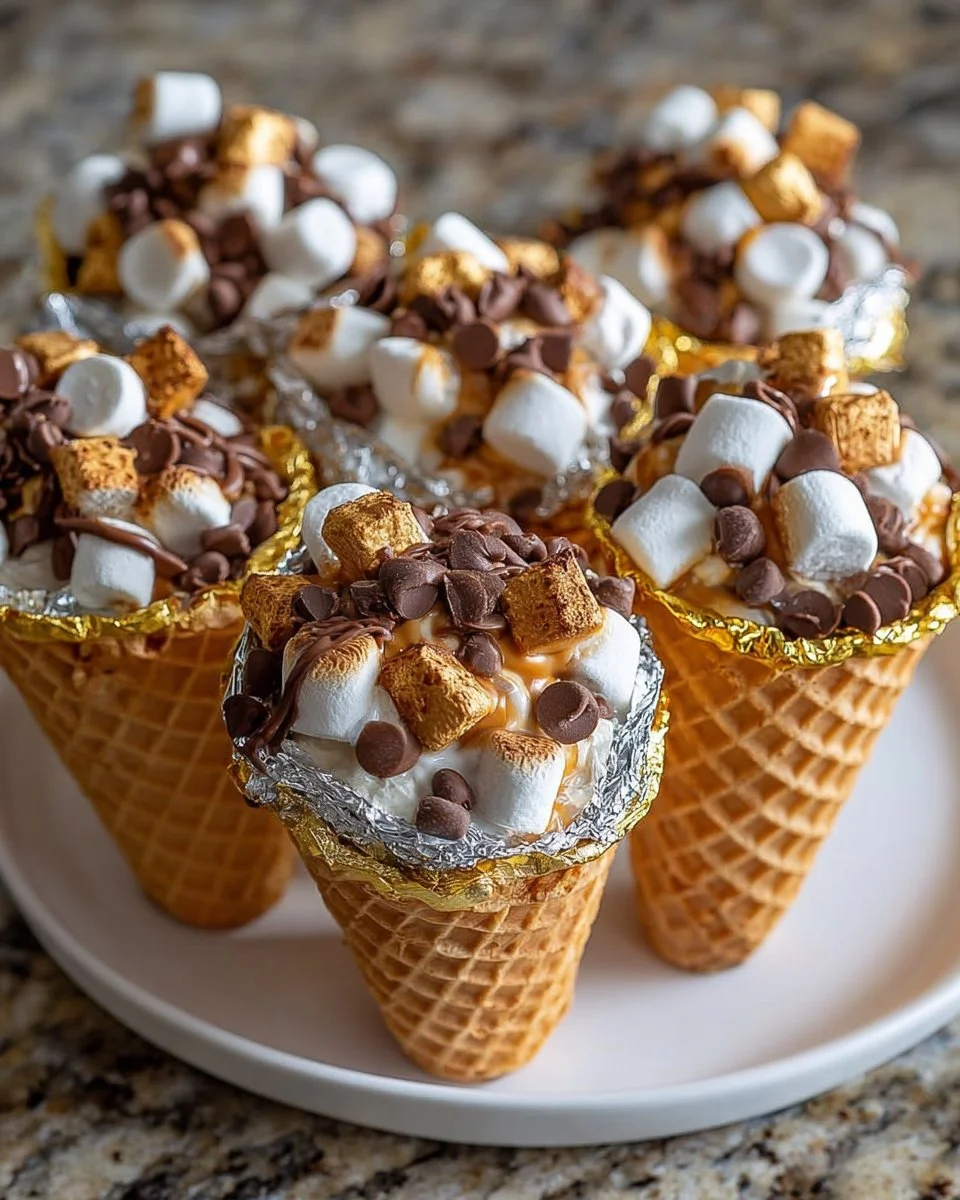
Deliciously gooey campfire cones filled with marshmallows, Reese’s Peanut Butter Cups, and chocolate chips, perfect for summer evenings or camping trips.
Ingredients
- 4 Waffle Cones
- 1 cup Mini Marshmallows
- 4 Reese’s Peanut Butter Cups (chopped)
- 1/2 cup Chocolate Chips
- Aluminum Foil
Instructions
- Preheat your campfire or grill to medium heat.
- Fill each waffle cone with mini marshmallows and chopped Reese’s Peanut Butter Cups.
- Wrap the cones tightly in aluminum foil.
- Place the cones over the campfire or grill, cooking for about 5–7 minutes.
- Carefully unwrap the cones and enjoy!
Notes
These cones can be made ahead and stored in the refrigerator for up to 2 days. Reheat before serving for best results.
Nutrition
- Serving Size: 1 cone
- Calories: 250
- Sugar: 20g
- Sodium: 100mg
- Fat: 12g
- Saturated Fat: 6g
- Unsaturated Fat: 5g
- Trans Fat: 0g
- Carbohydrates: 36g
- Fiber: 1g
- Protein: 4g
- Cholesterol: 5mg


